Properties
Working on the Quickstart? Get back to Step 2 here: Setup Properties.
Your Dashboard Properties view provides a central place to manage property or properties. Use this view to:
Create a Property
Creating a property is done from within your dashboard. If you have permission to add a property, you will see the add property button, as shown in the screenshot below.
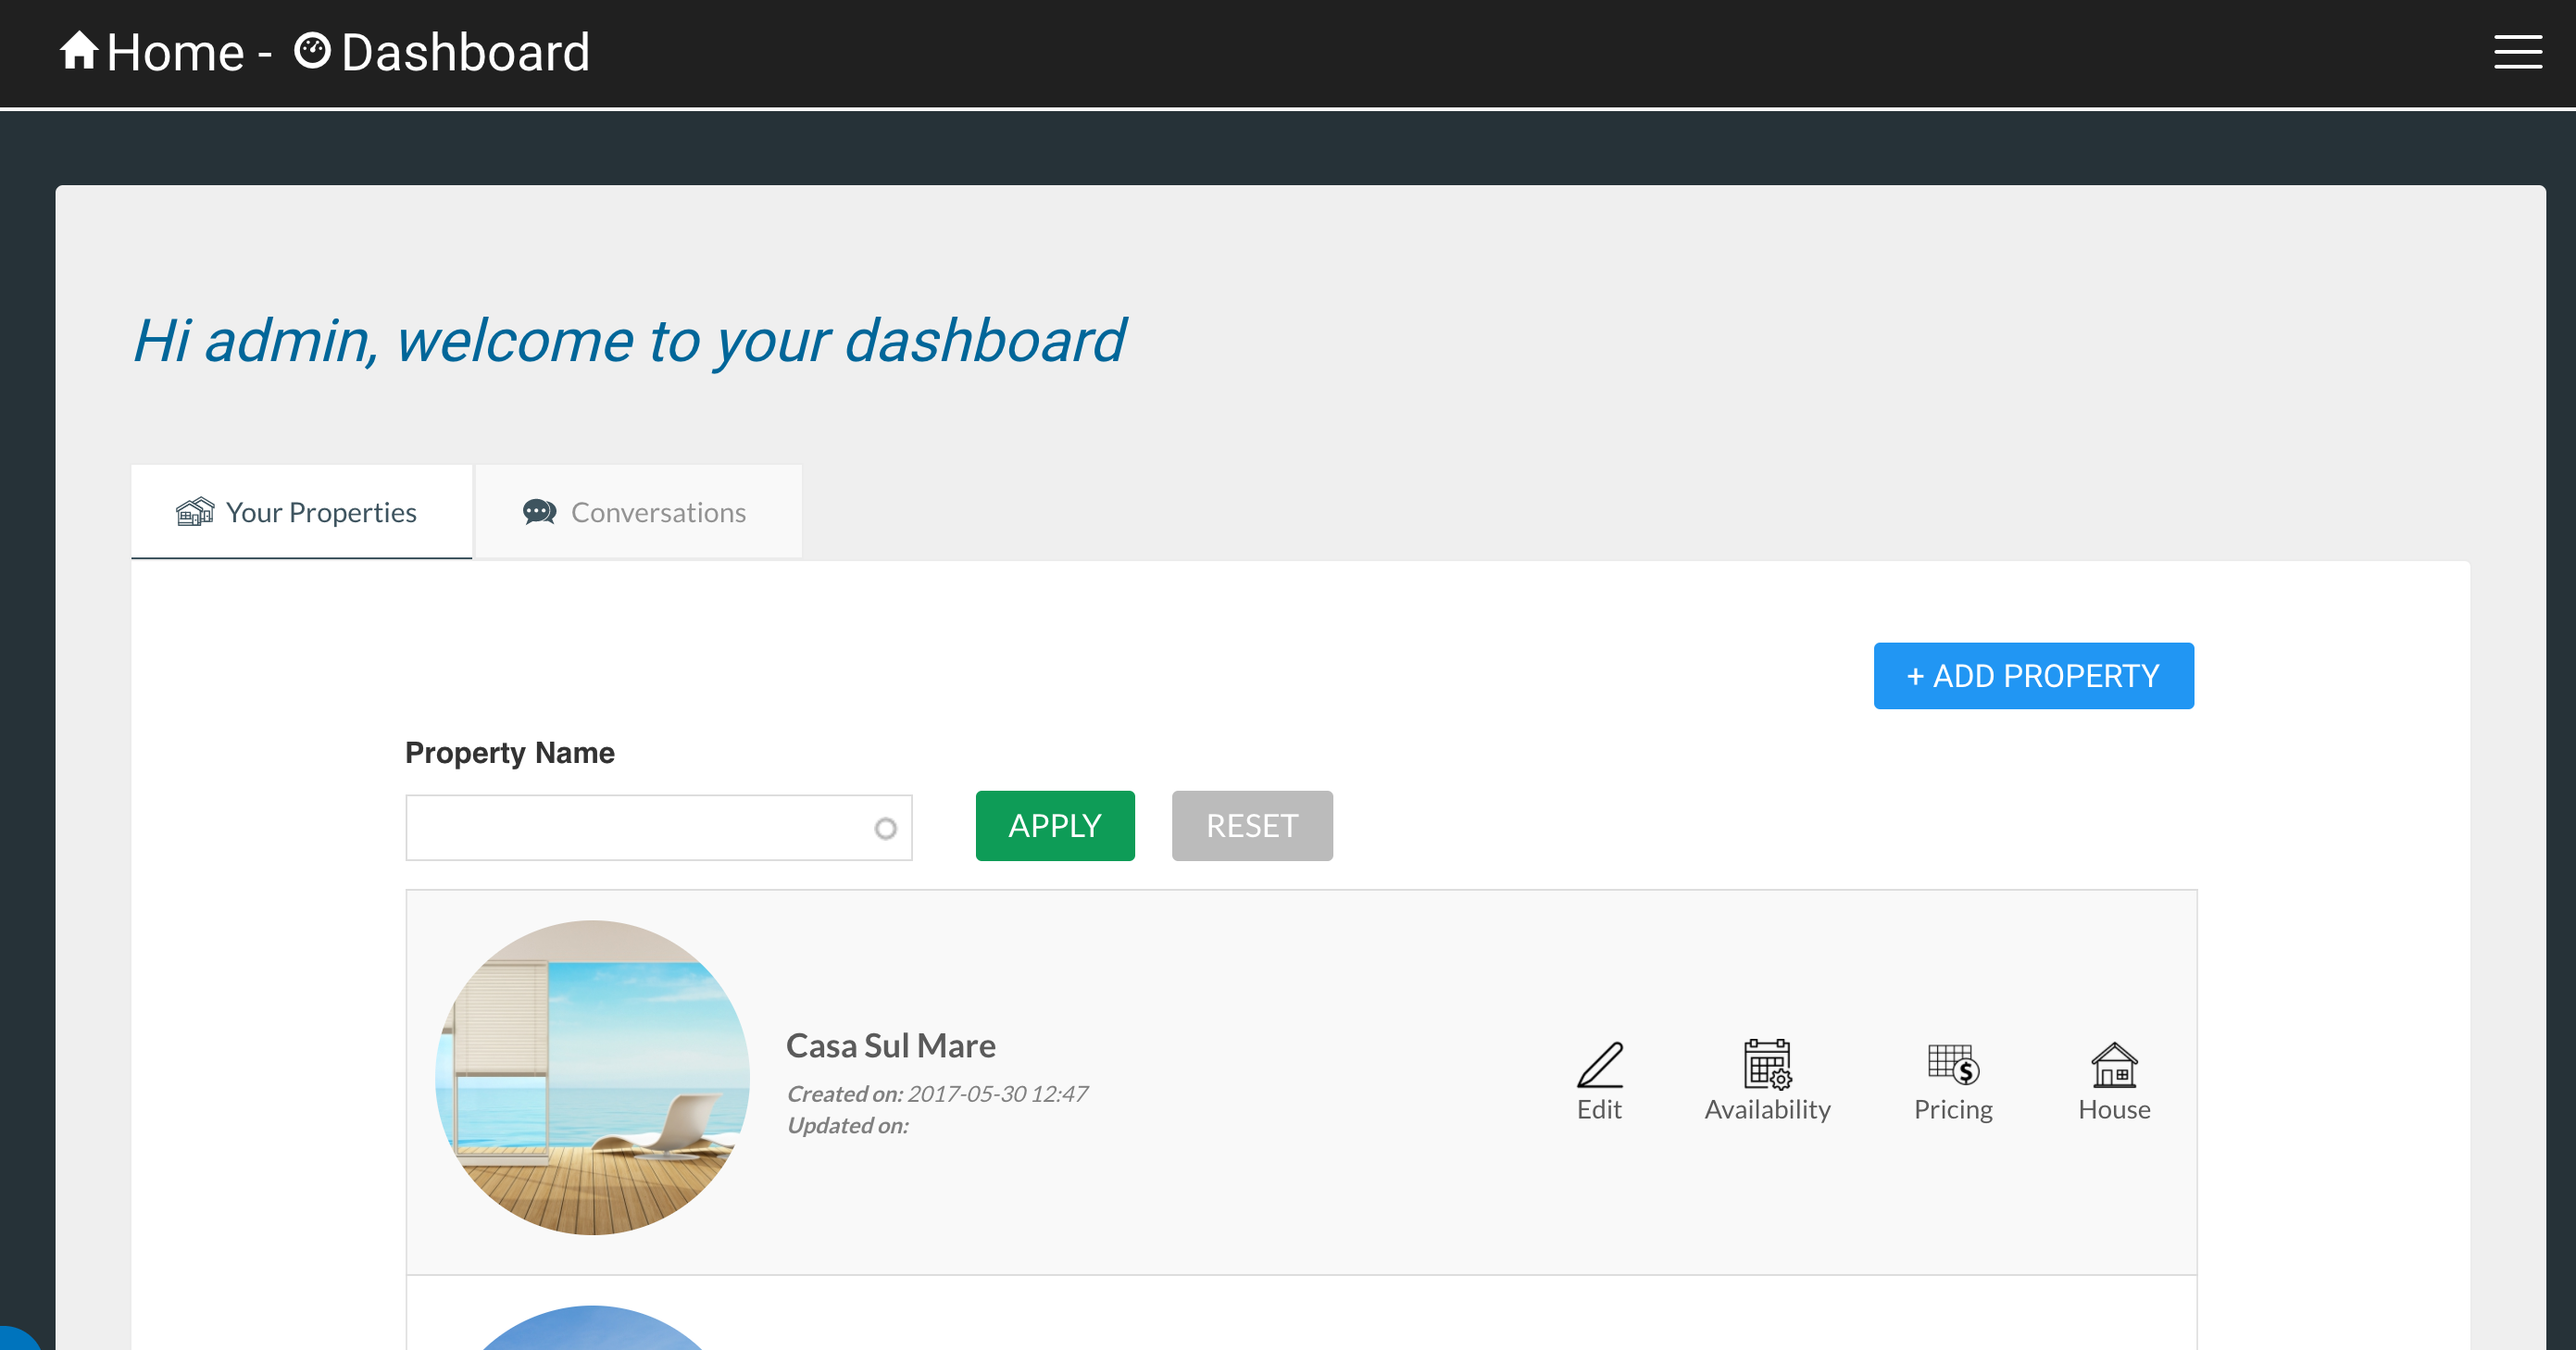
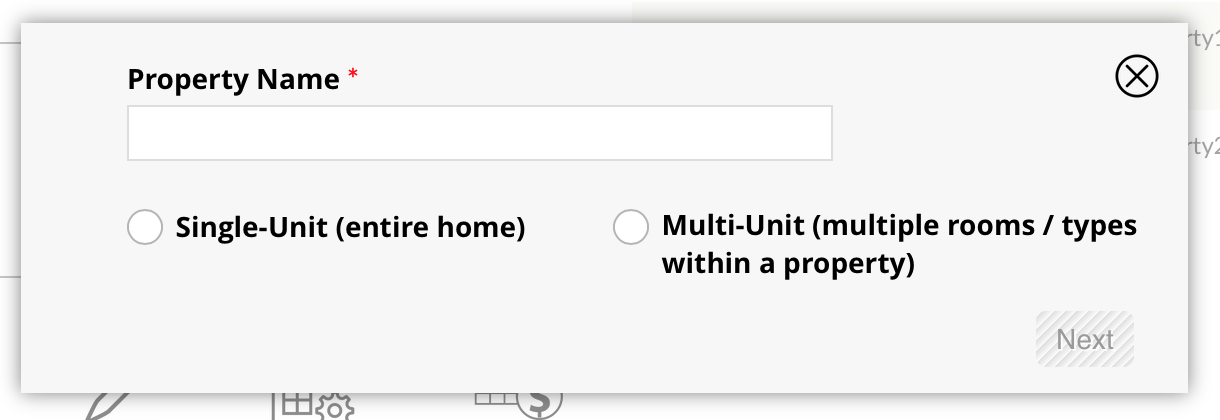
Click on add property. You will be asked for the name of the Property, and asked to select the type of property:
-
A single-unit property is a property that can only be booked as a whole. The most common type of single-unit property is a Vacation Rental. The rental property may have 1, 2, or even 12 bedrooms, but a booking is made for the whole property.
-
A multi-unit property is a property with multiple individually bookable rooms. Both B & B’s and Hotels are multi-unit properties.
Single-Unit Property
To create a single-unit property, enter the name of the property, select single-unit (Entire Home), and click next. You will then be asked to define the maximum number of occupants, and the default nightly rate:
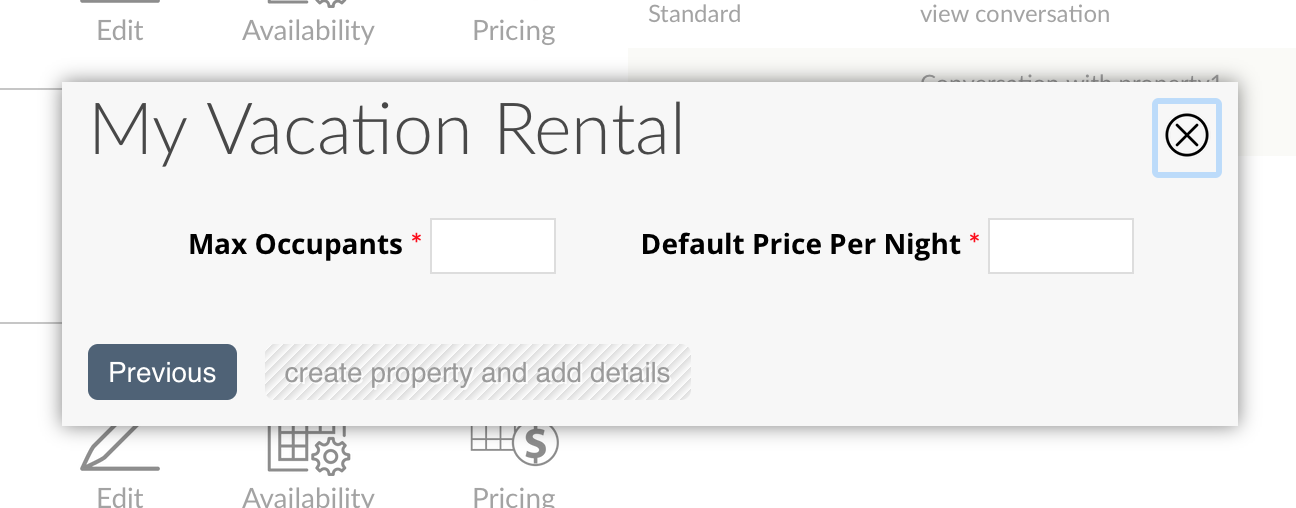
Click on Create property and add details - this will create your property and direct you to the property management interface: Manage Properties
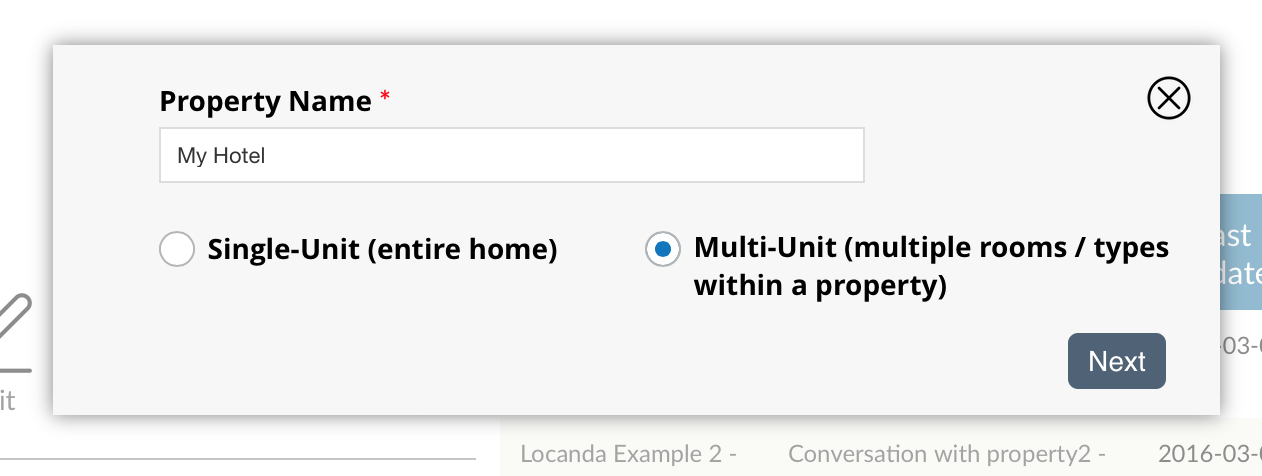
Multi-Unit Property
To create a multi-unit property, enter the name of the property, select Multi-Unit (multiple rooms / types within a property), and click next.
You will be asked to enter the type name, number of rooms, default price per night, and max occupancy, for each of your room types. If you have a B&B, it will look something like this:
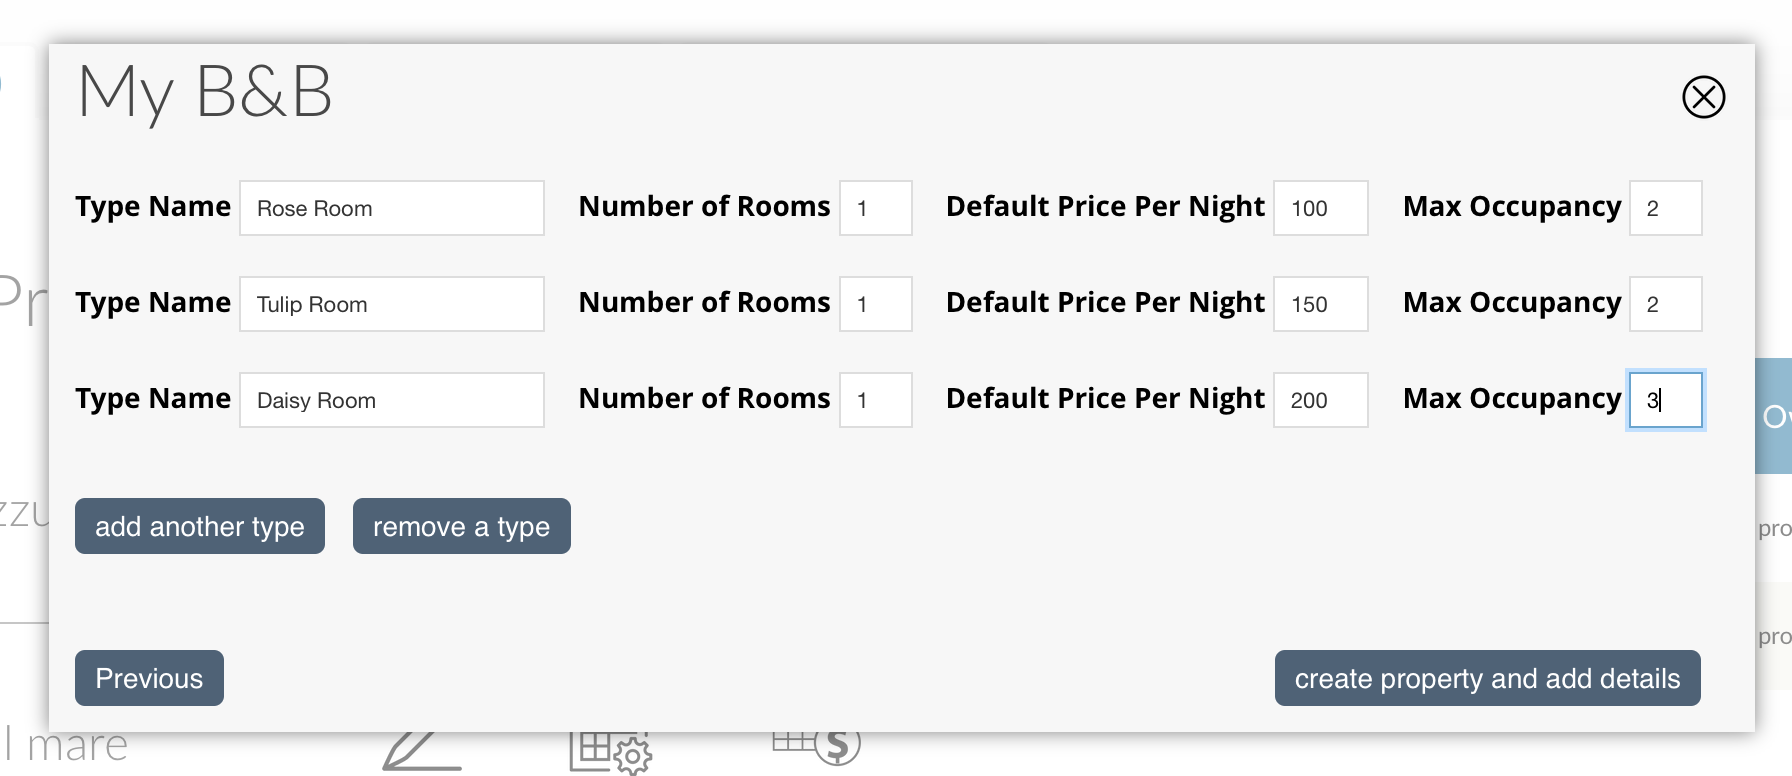
A hotel might look more like this:
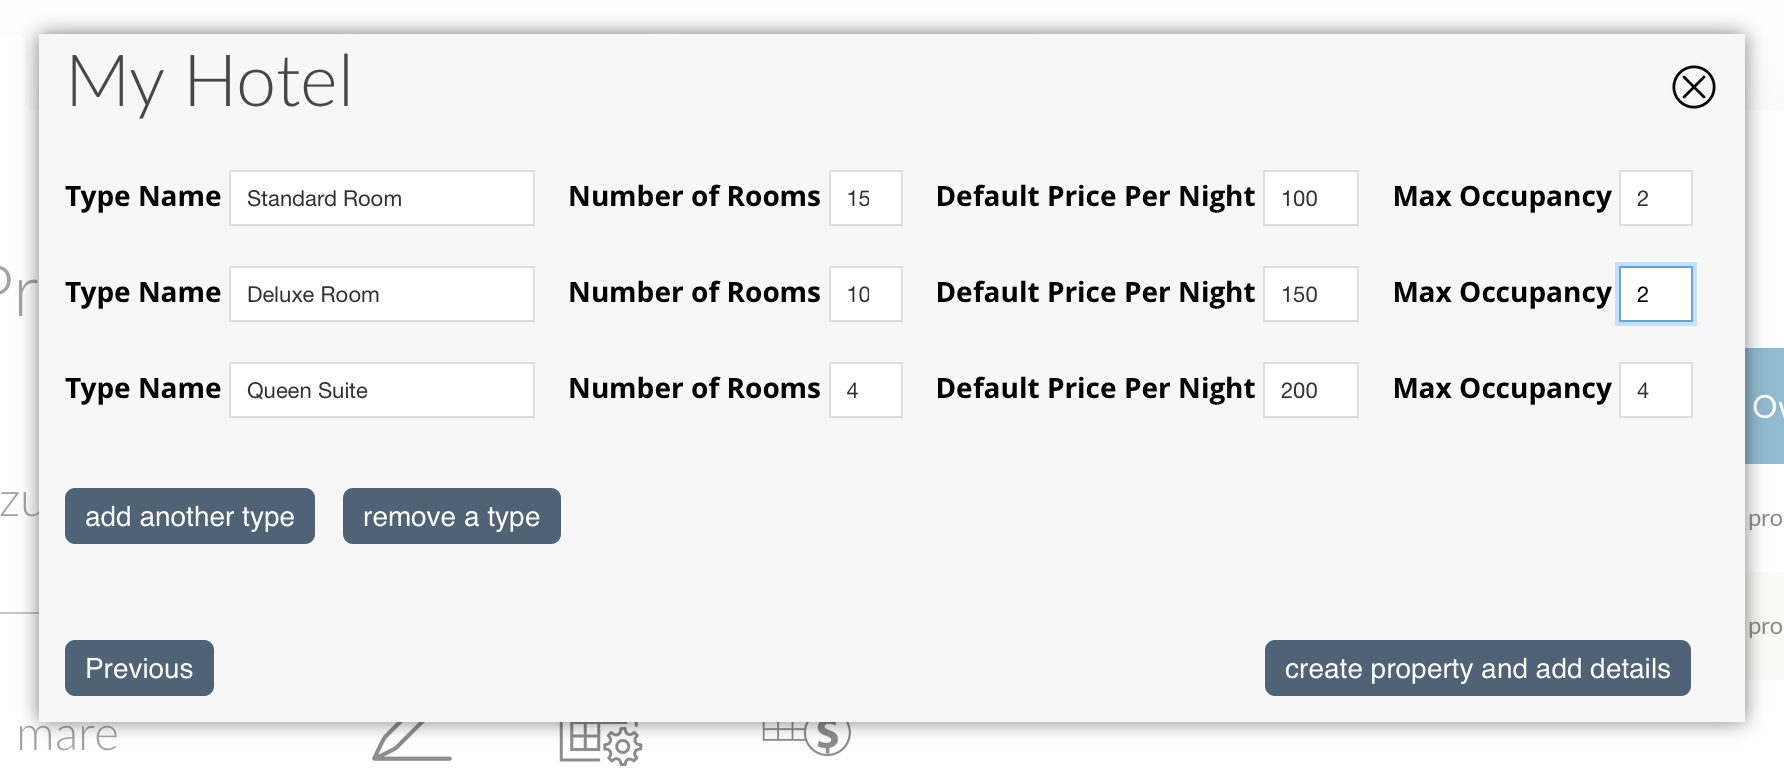
When you have finished adding your room types (don’t worry, you can always add more later), click on Create property and add details - this will create your property and direct you to the property management interface: Manage Properties
Manage Properties
Every property has five tabs:
View
Click on this tab to see how your property is displayed on the site.
Edit
A Property has several categories of information associated with it:
Basic Information
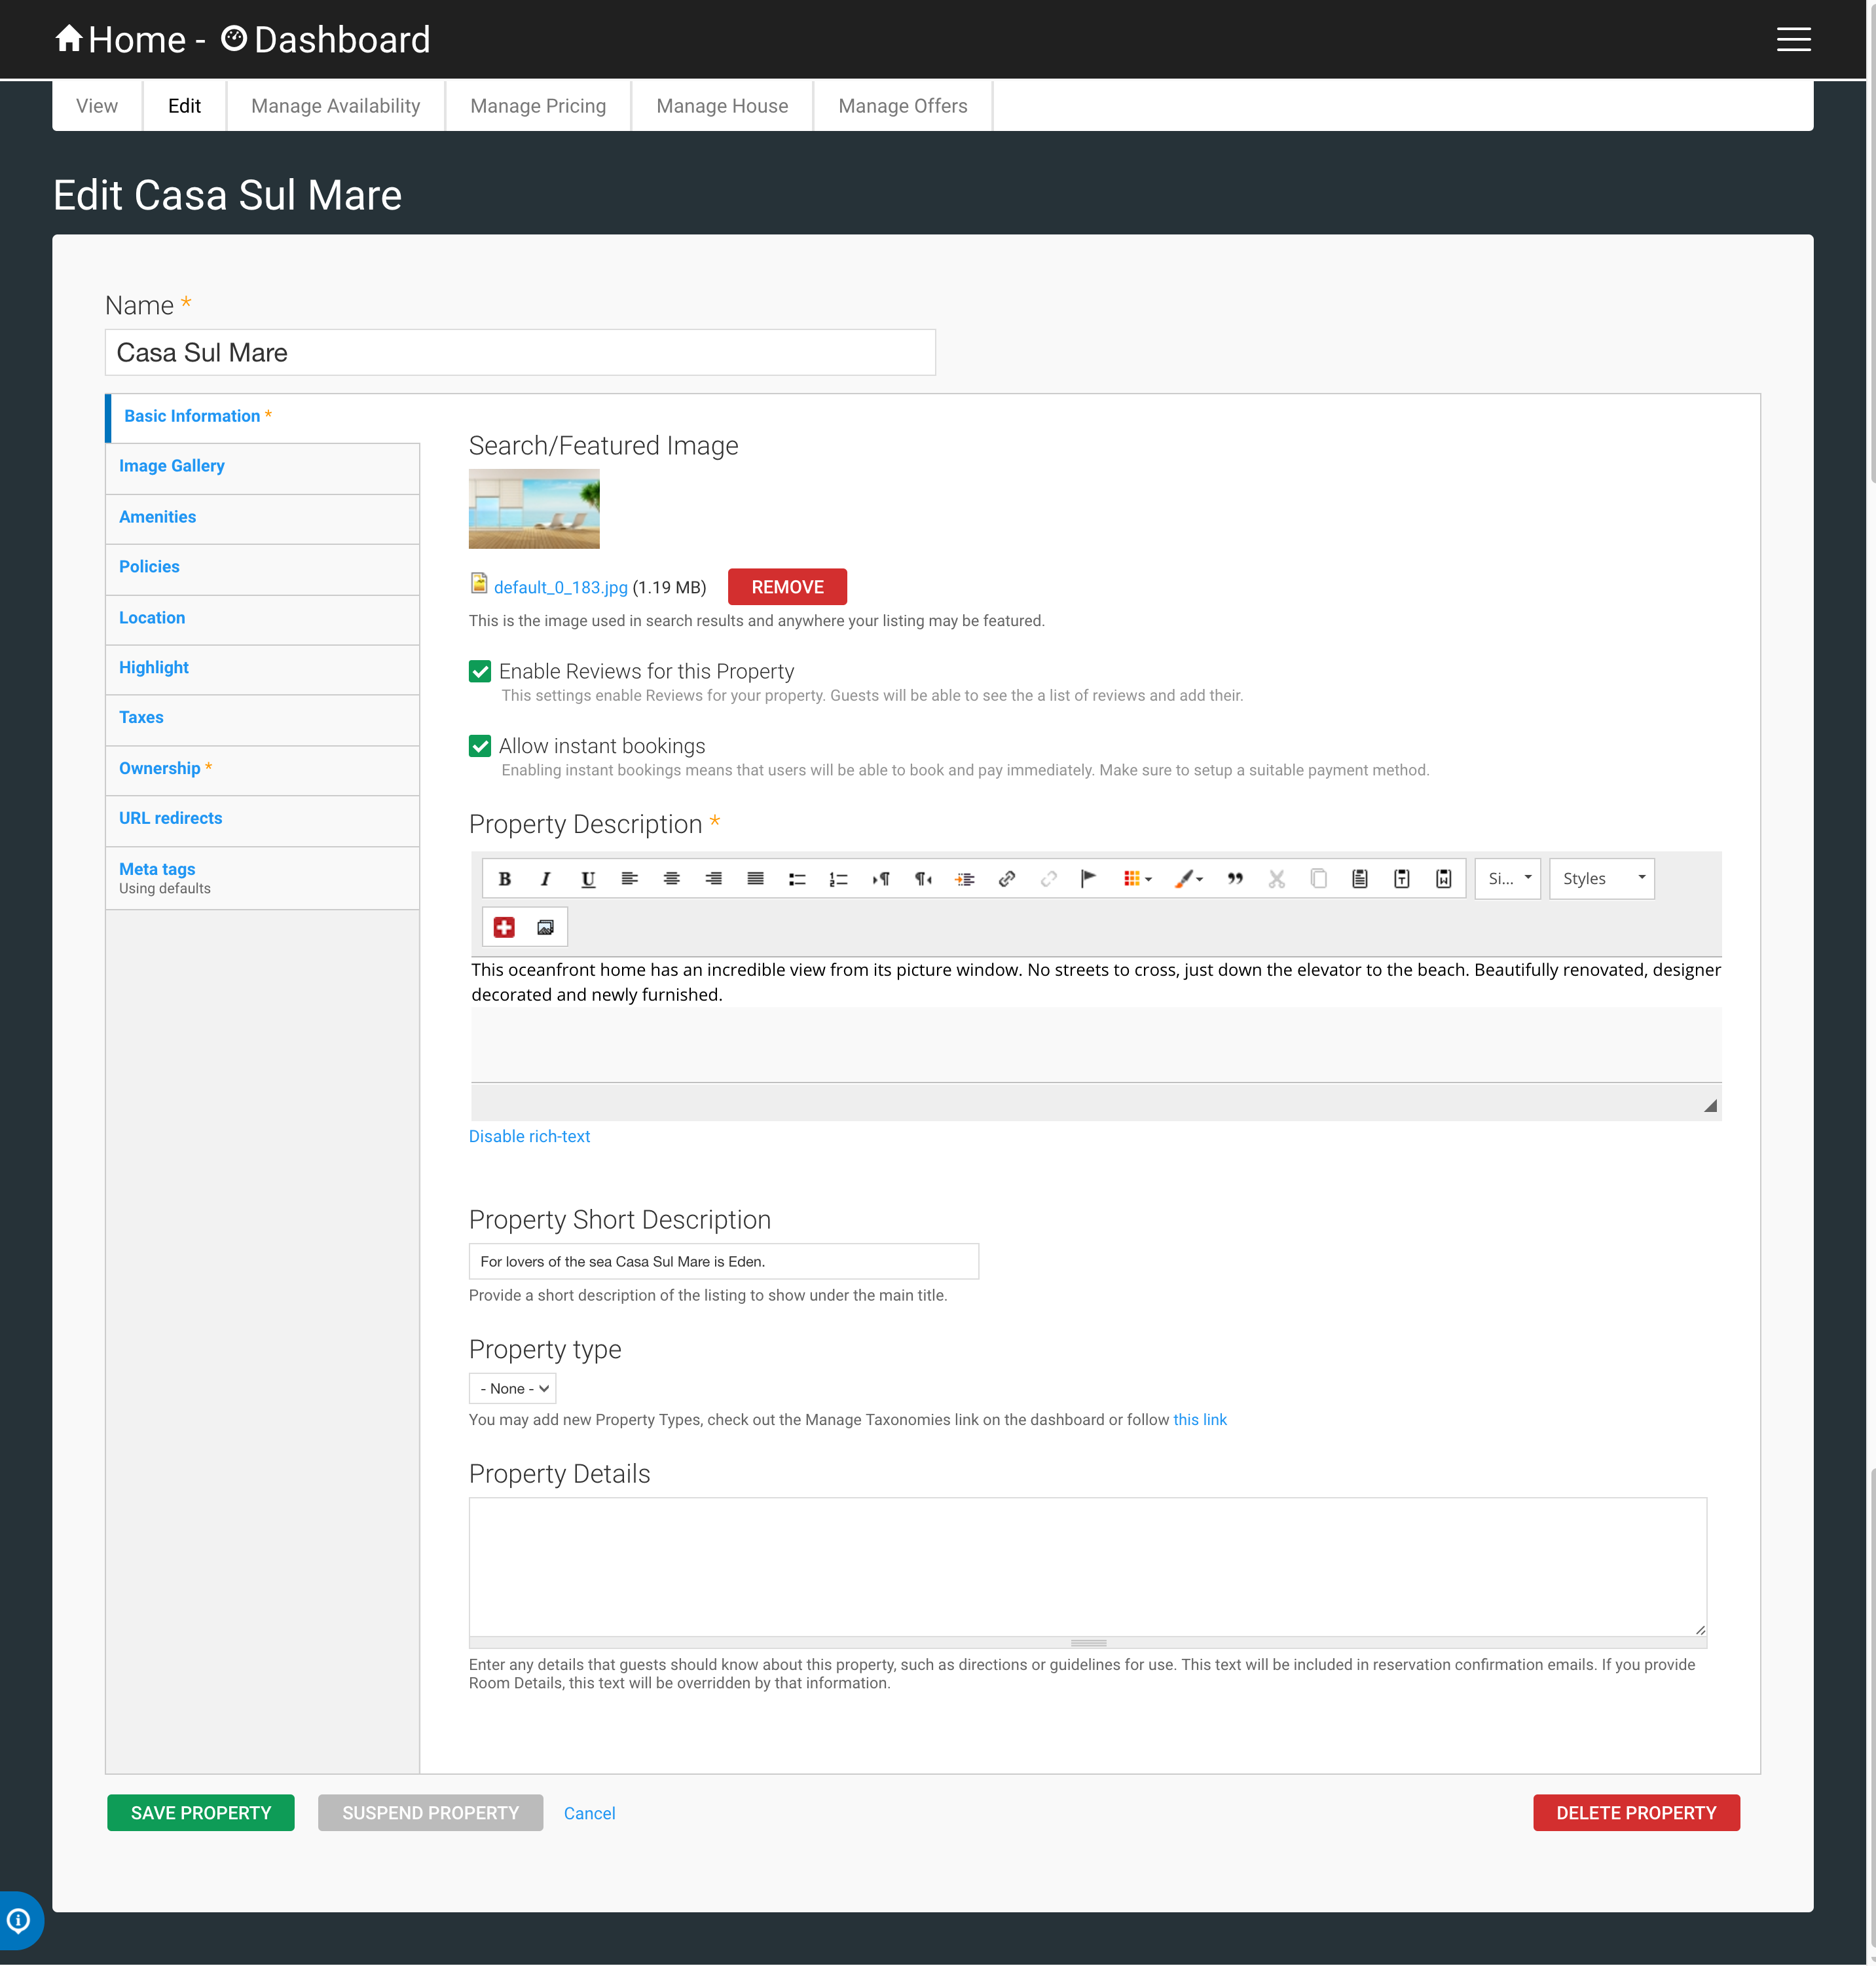
- Property Description
- The property description is displayed in the Overview tab at the bottom of your property page.
- Property Short Description
- The property short description is shown below the Image Gallery at the top of your property page.
- Search/Featured Image
- This image is used in search results, and anywhere your property is featured on the site. It will not appear in the image gallery. After uploading an image, select a crop area for each image style from the options below the uploaded image.
- Property type
- Some Roomify for Accommodations sites may have property categories, if so, you may select the property type that best describes your property.
- Allow instant bookings
- If the site on which your property is listed allows instant bookings, this switch will allow you to turn off instant bookings for your individual property, and only take bookings via Enquiries. This setting will be overridden by the Allow instant bookings setting on the House or Room, and will have no effect at all if instant bookings have been disabled site-wide.
- Enable Reviews for this Property
- This will enable reviews for the property. Guests will find a “Review” button and they will be able to write a review with a rate. Property owners will be notified and will be able to publish/unpublish reviews.
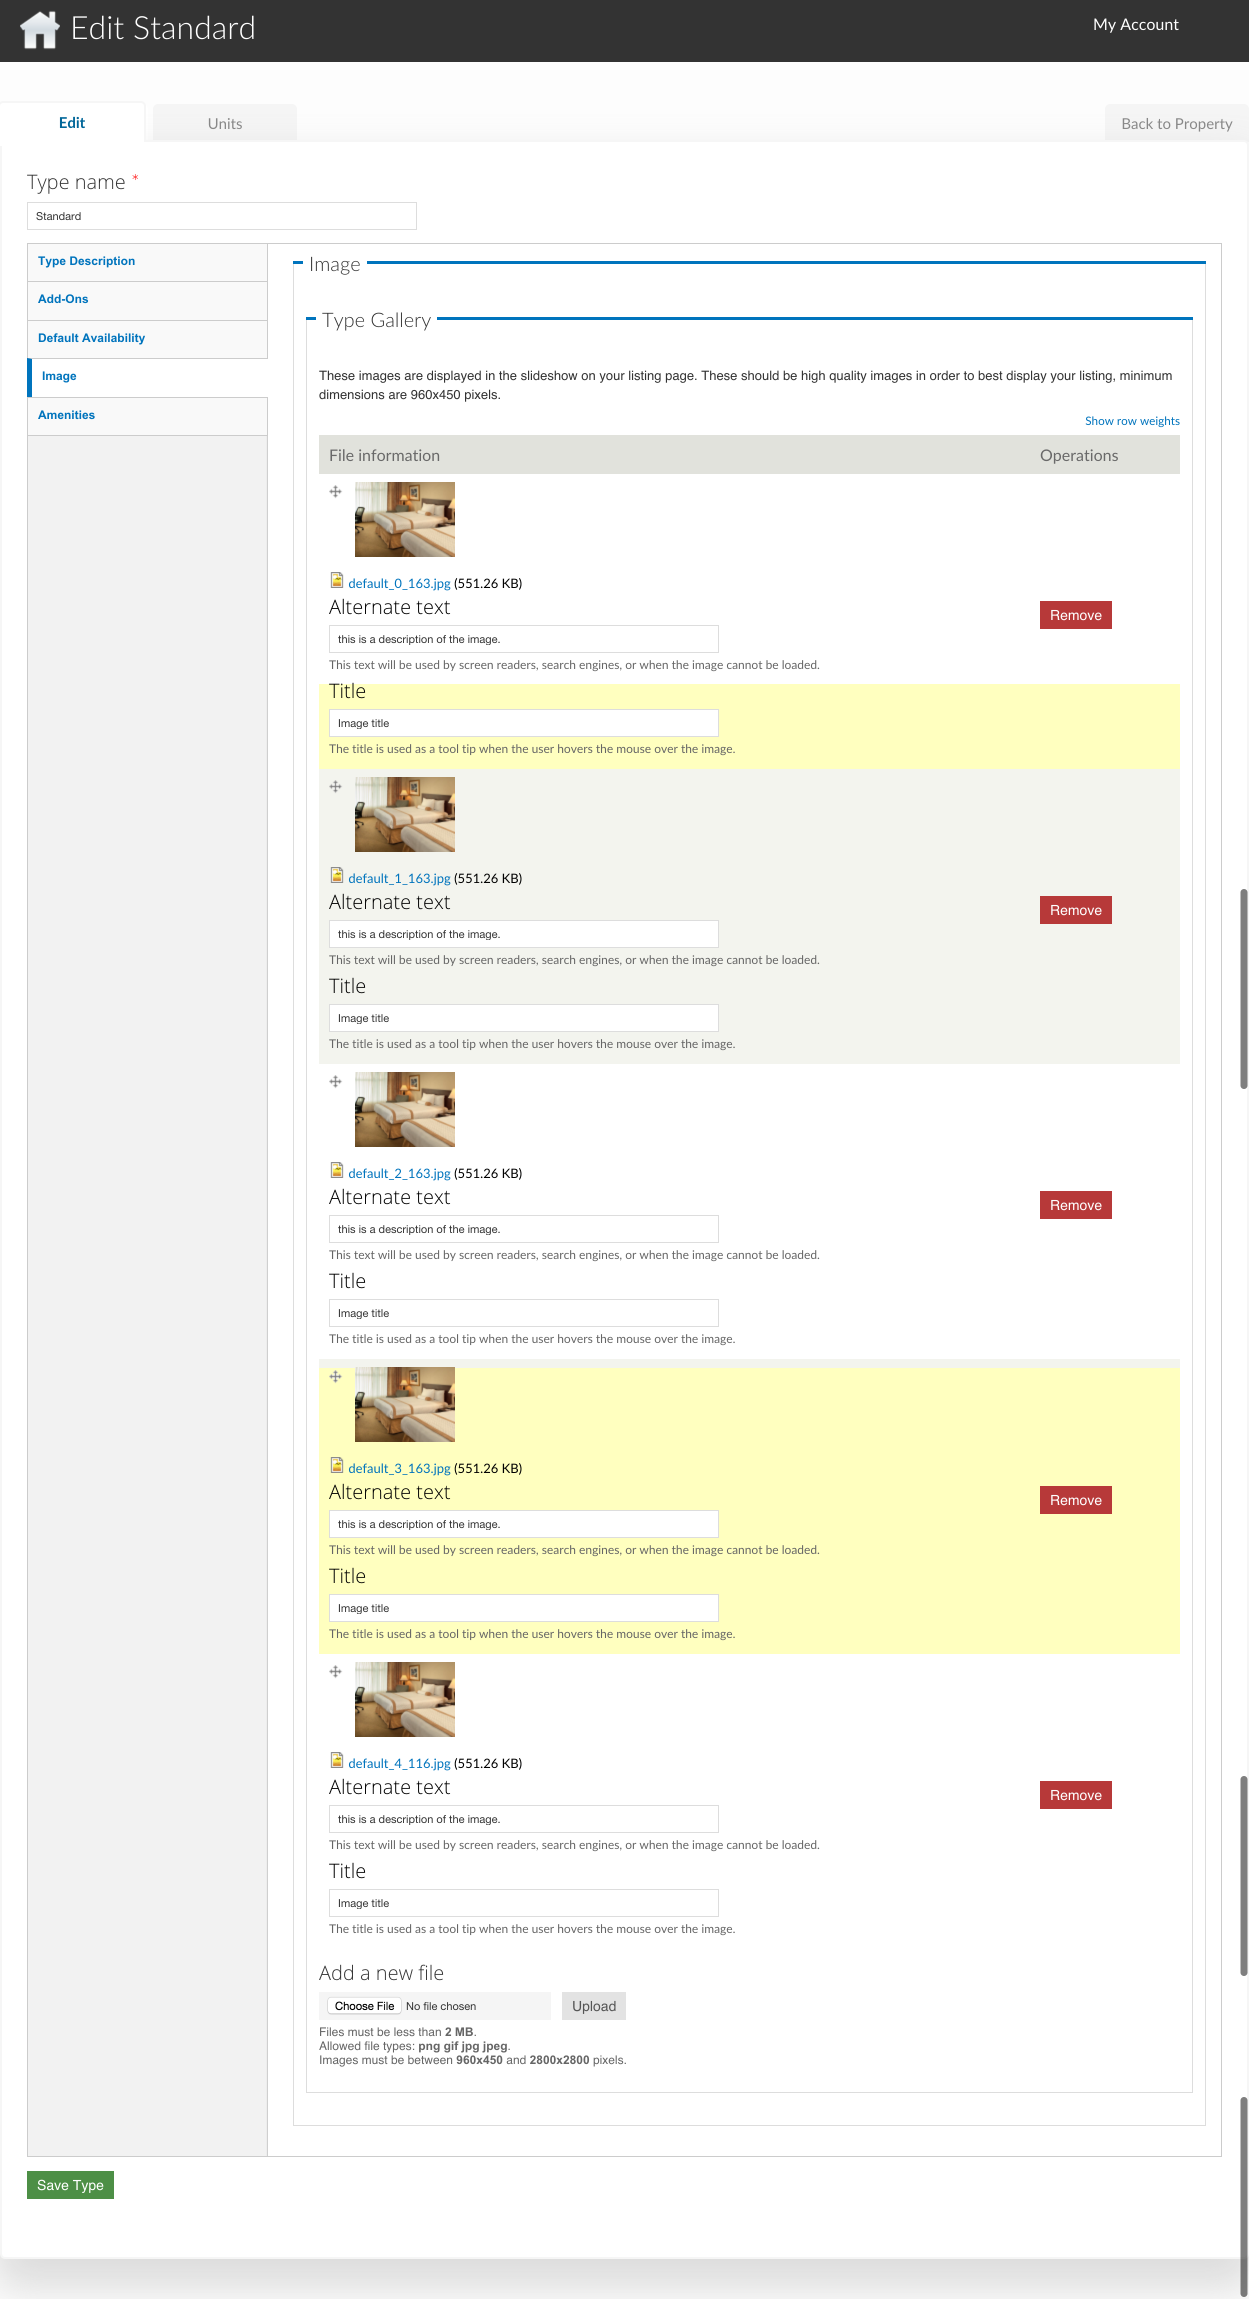
Image Gallery
Each image in your gallery can have an optional title and caption, both will overlay the bottom portion of the image.
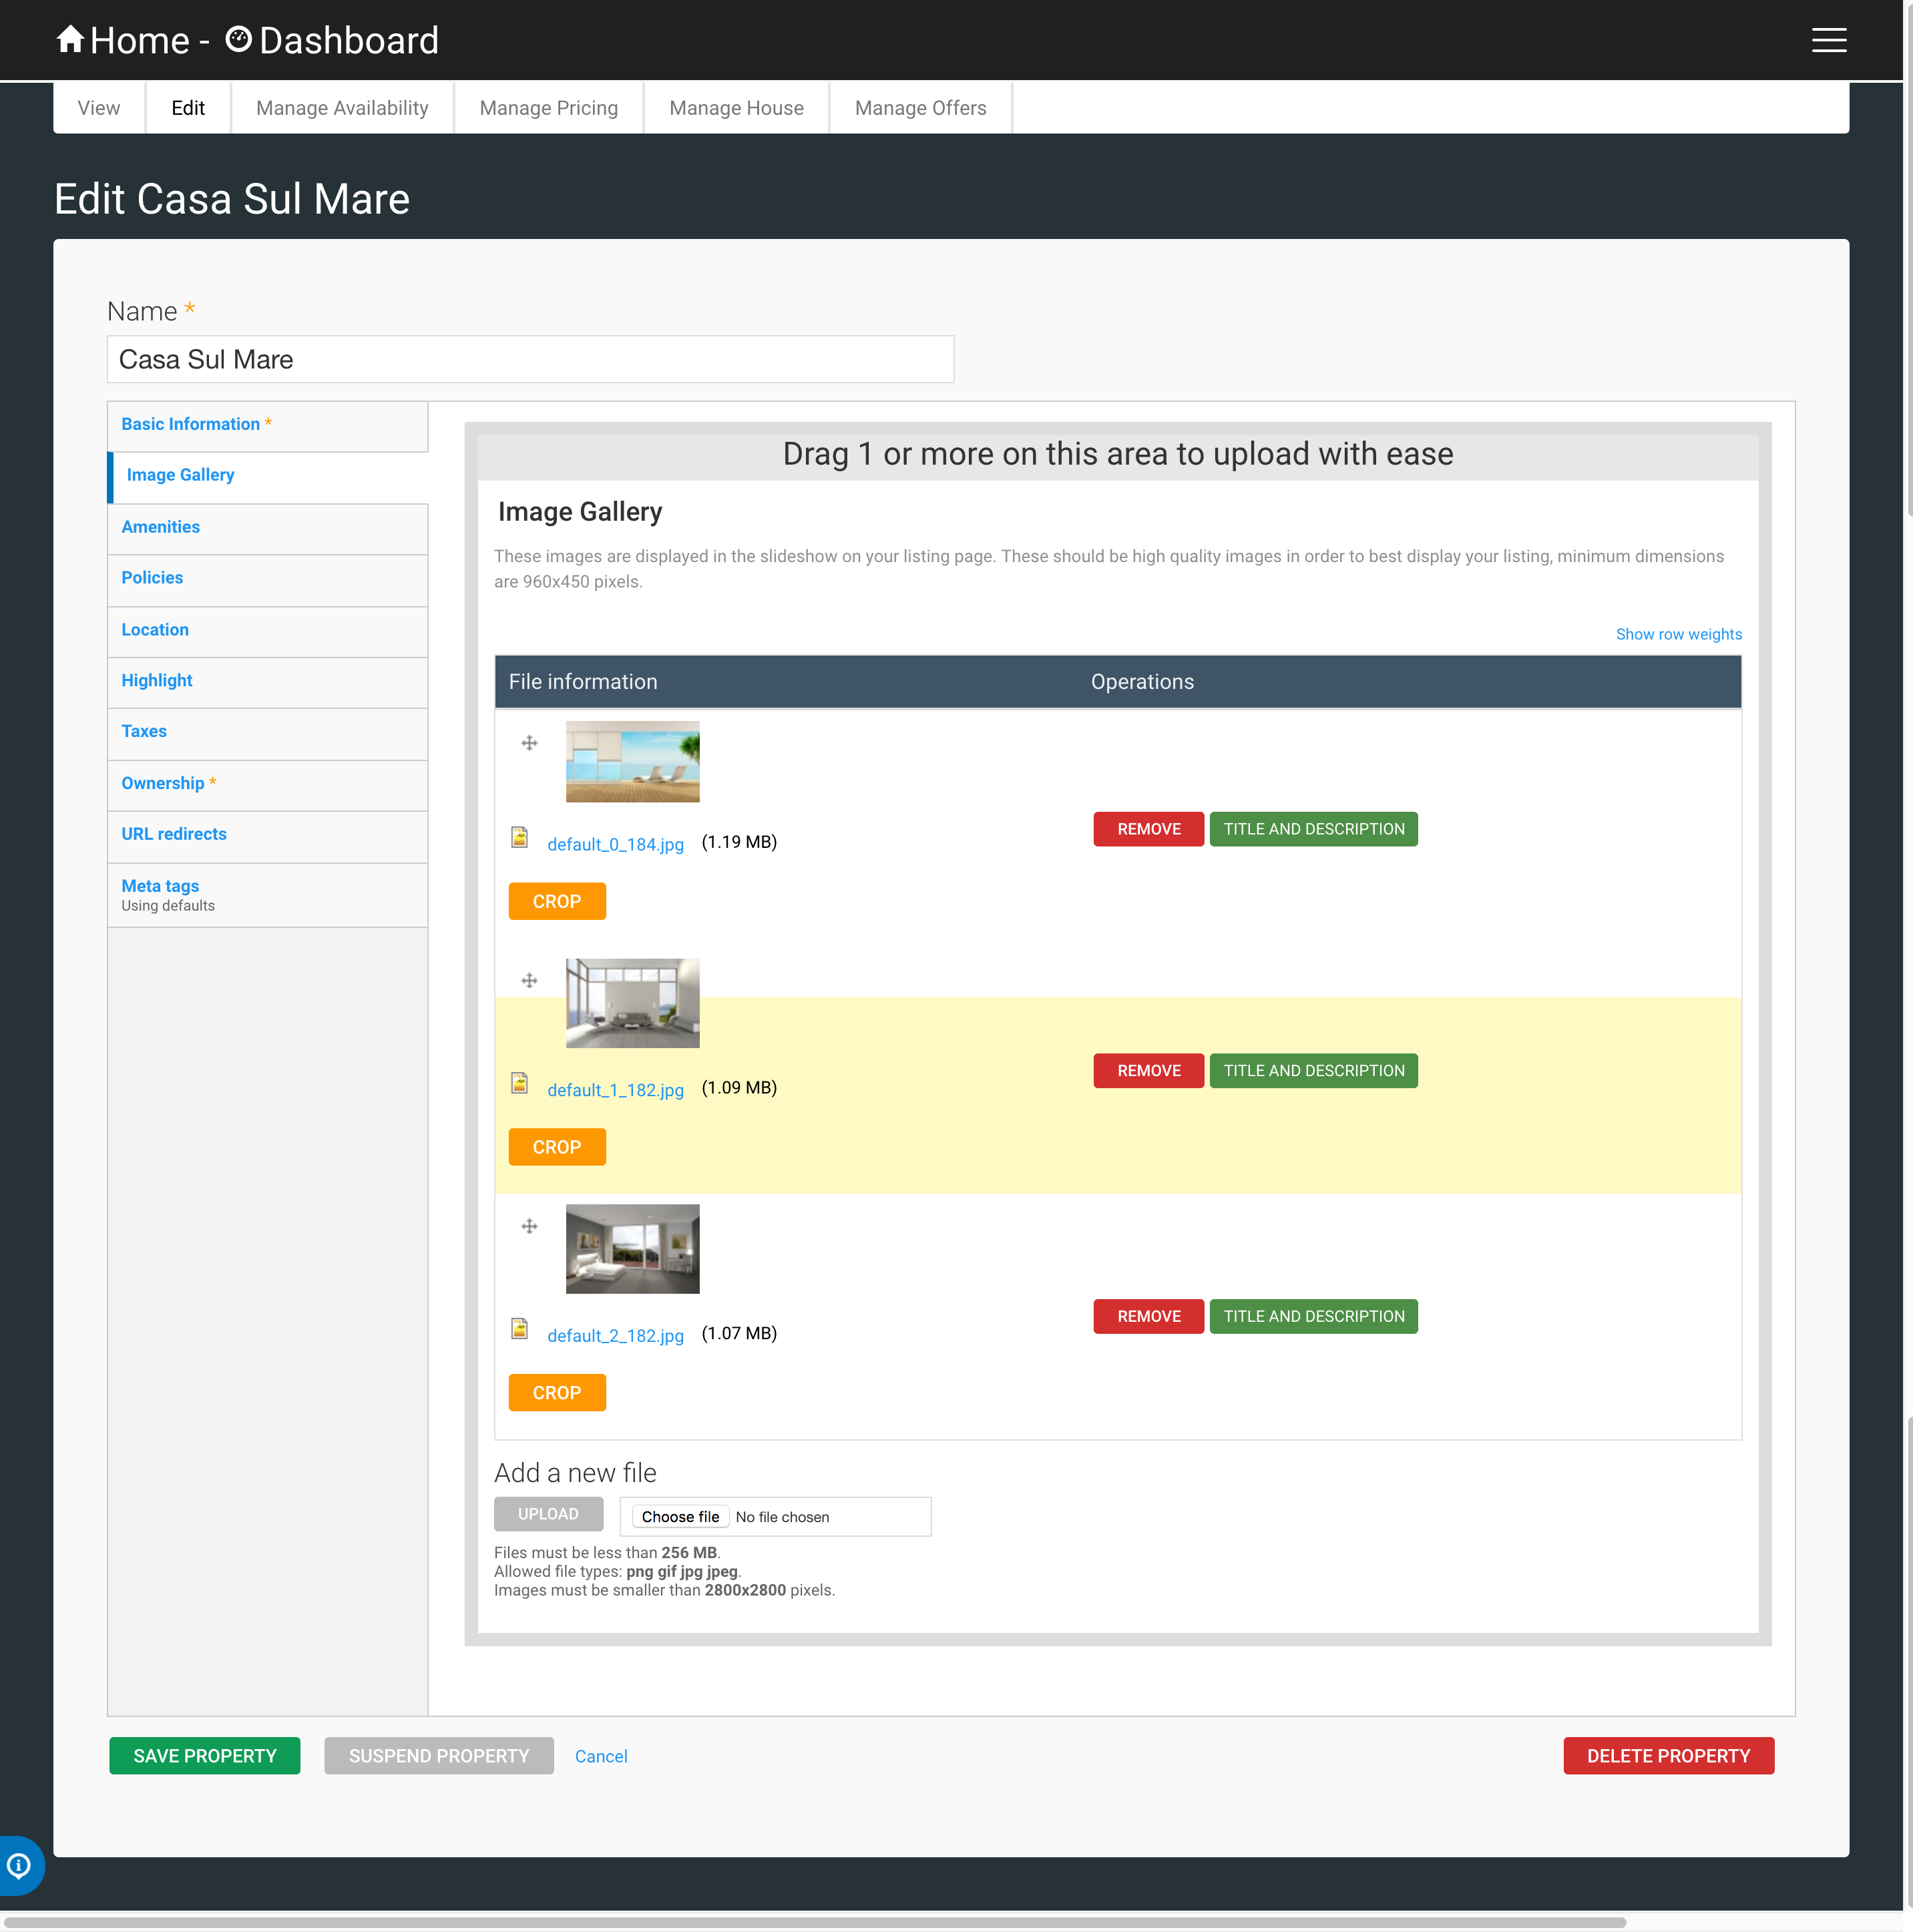
- Image Description
- This is the image description. It will be displayed underneath the image title, as well as be used by screen readers, and anywhere the image cannot be displayed.
- Image Title
- This is the title of the image.
To add an additional image, simply click on Choose File in the Add a new file section, select a file from your computer, and click Upload.
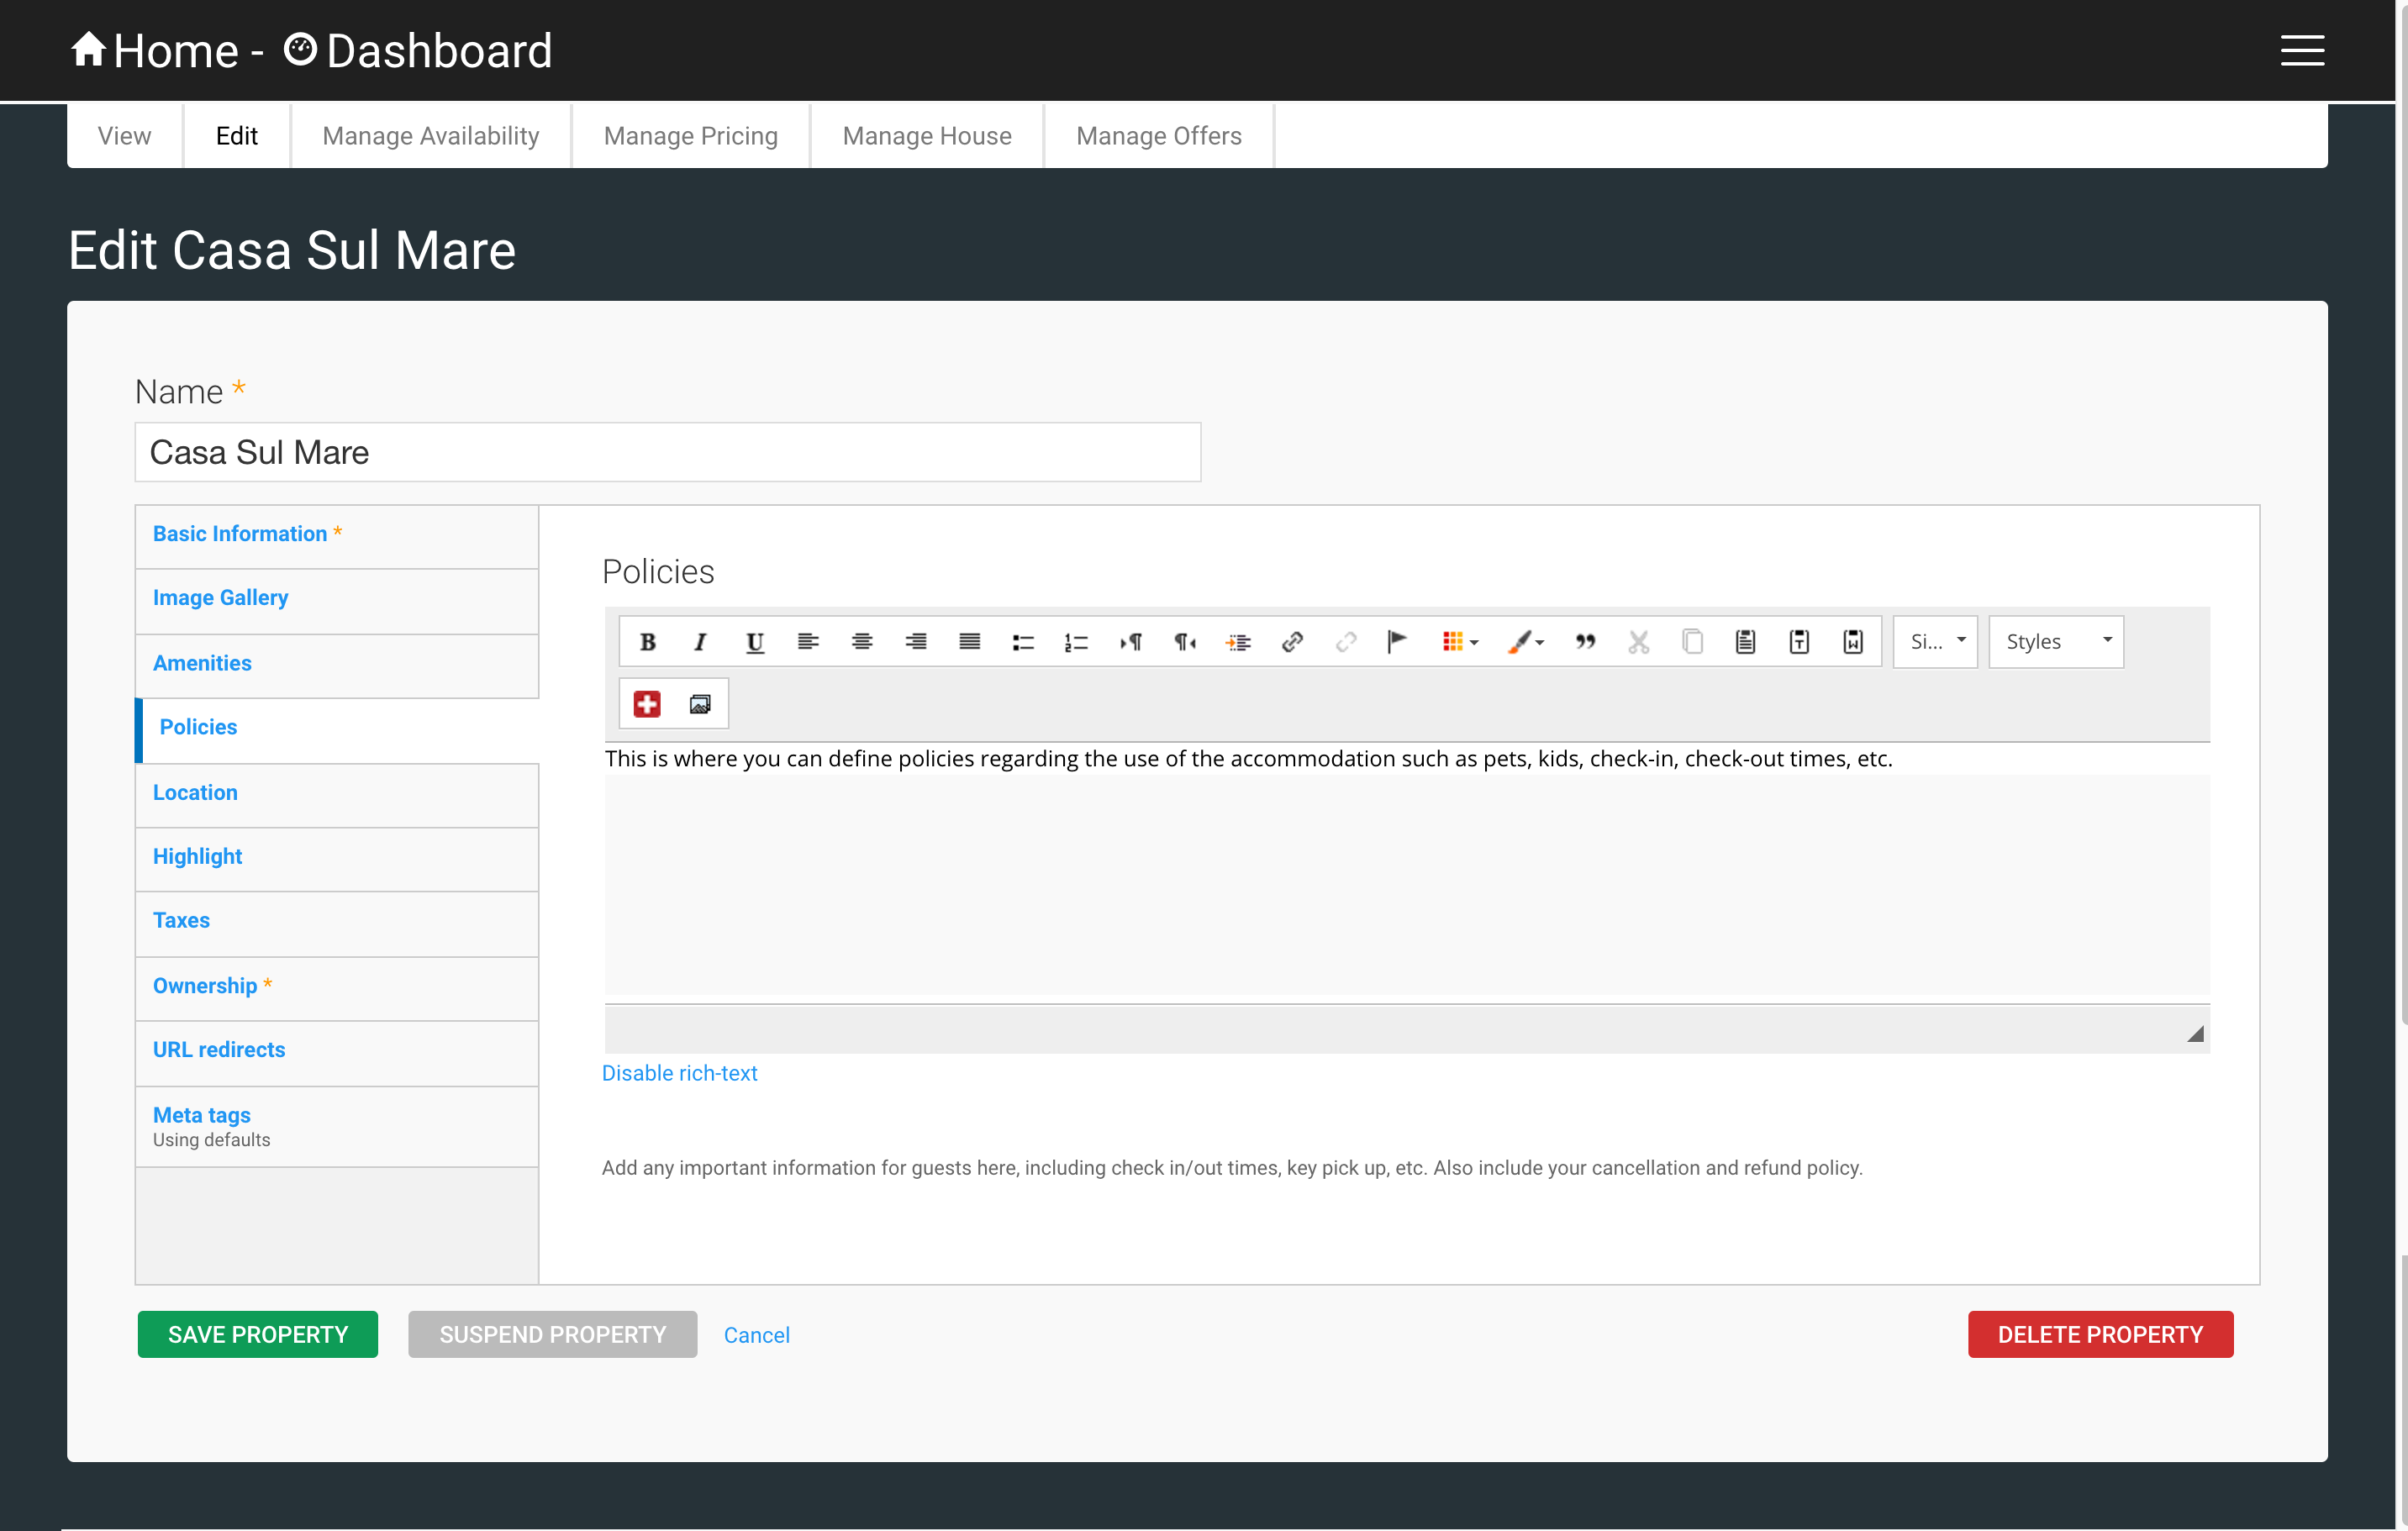
Policies
Any information about policies or rules should be specified here. This will be displayed in the Policies tab, at the bottom of your property page. If this field is left empty, the tab will not be displayed.
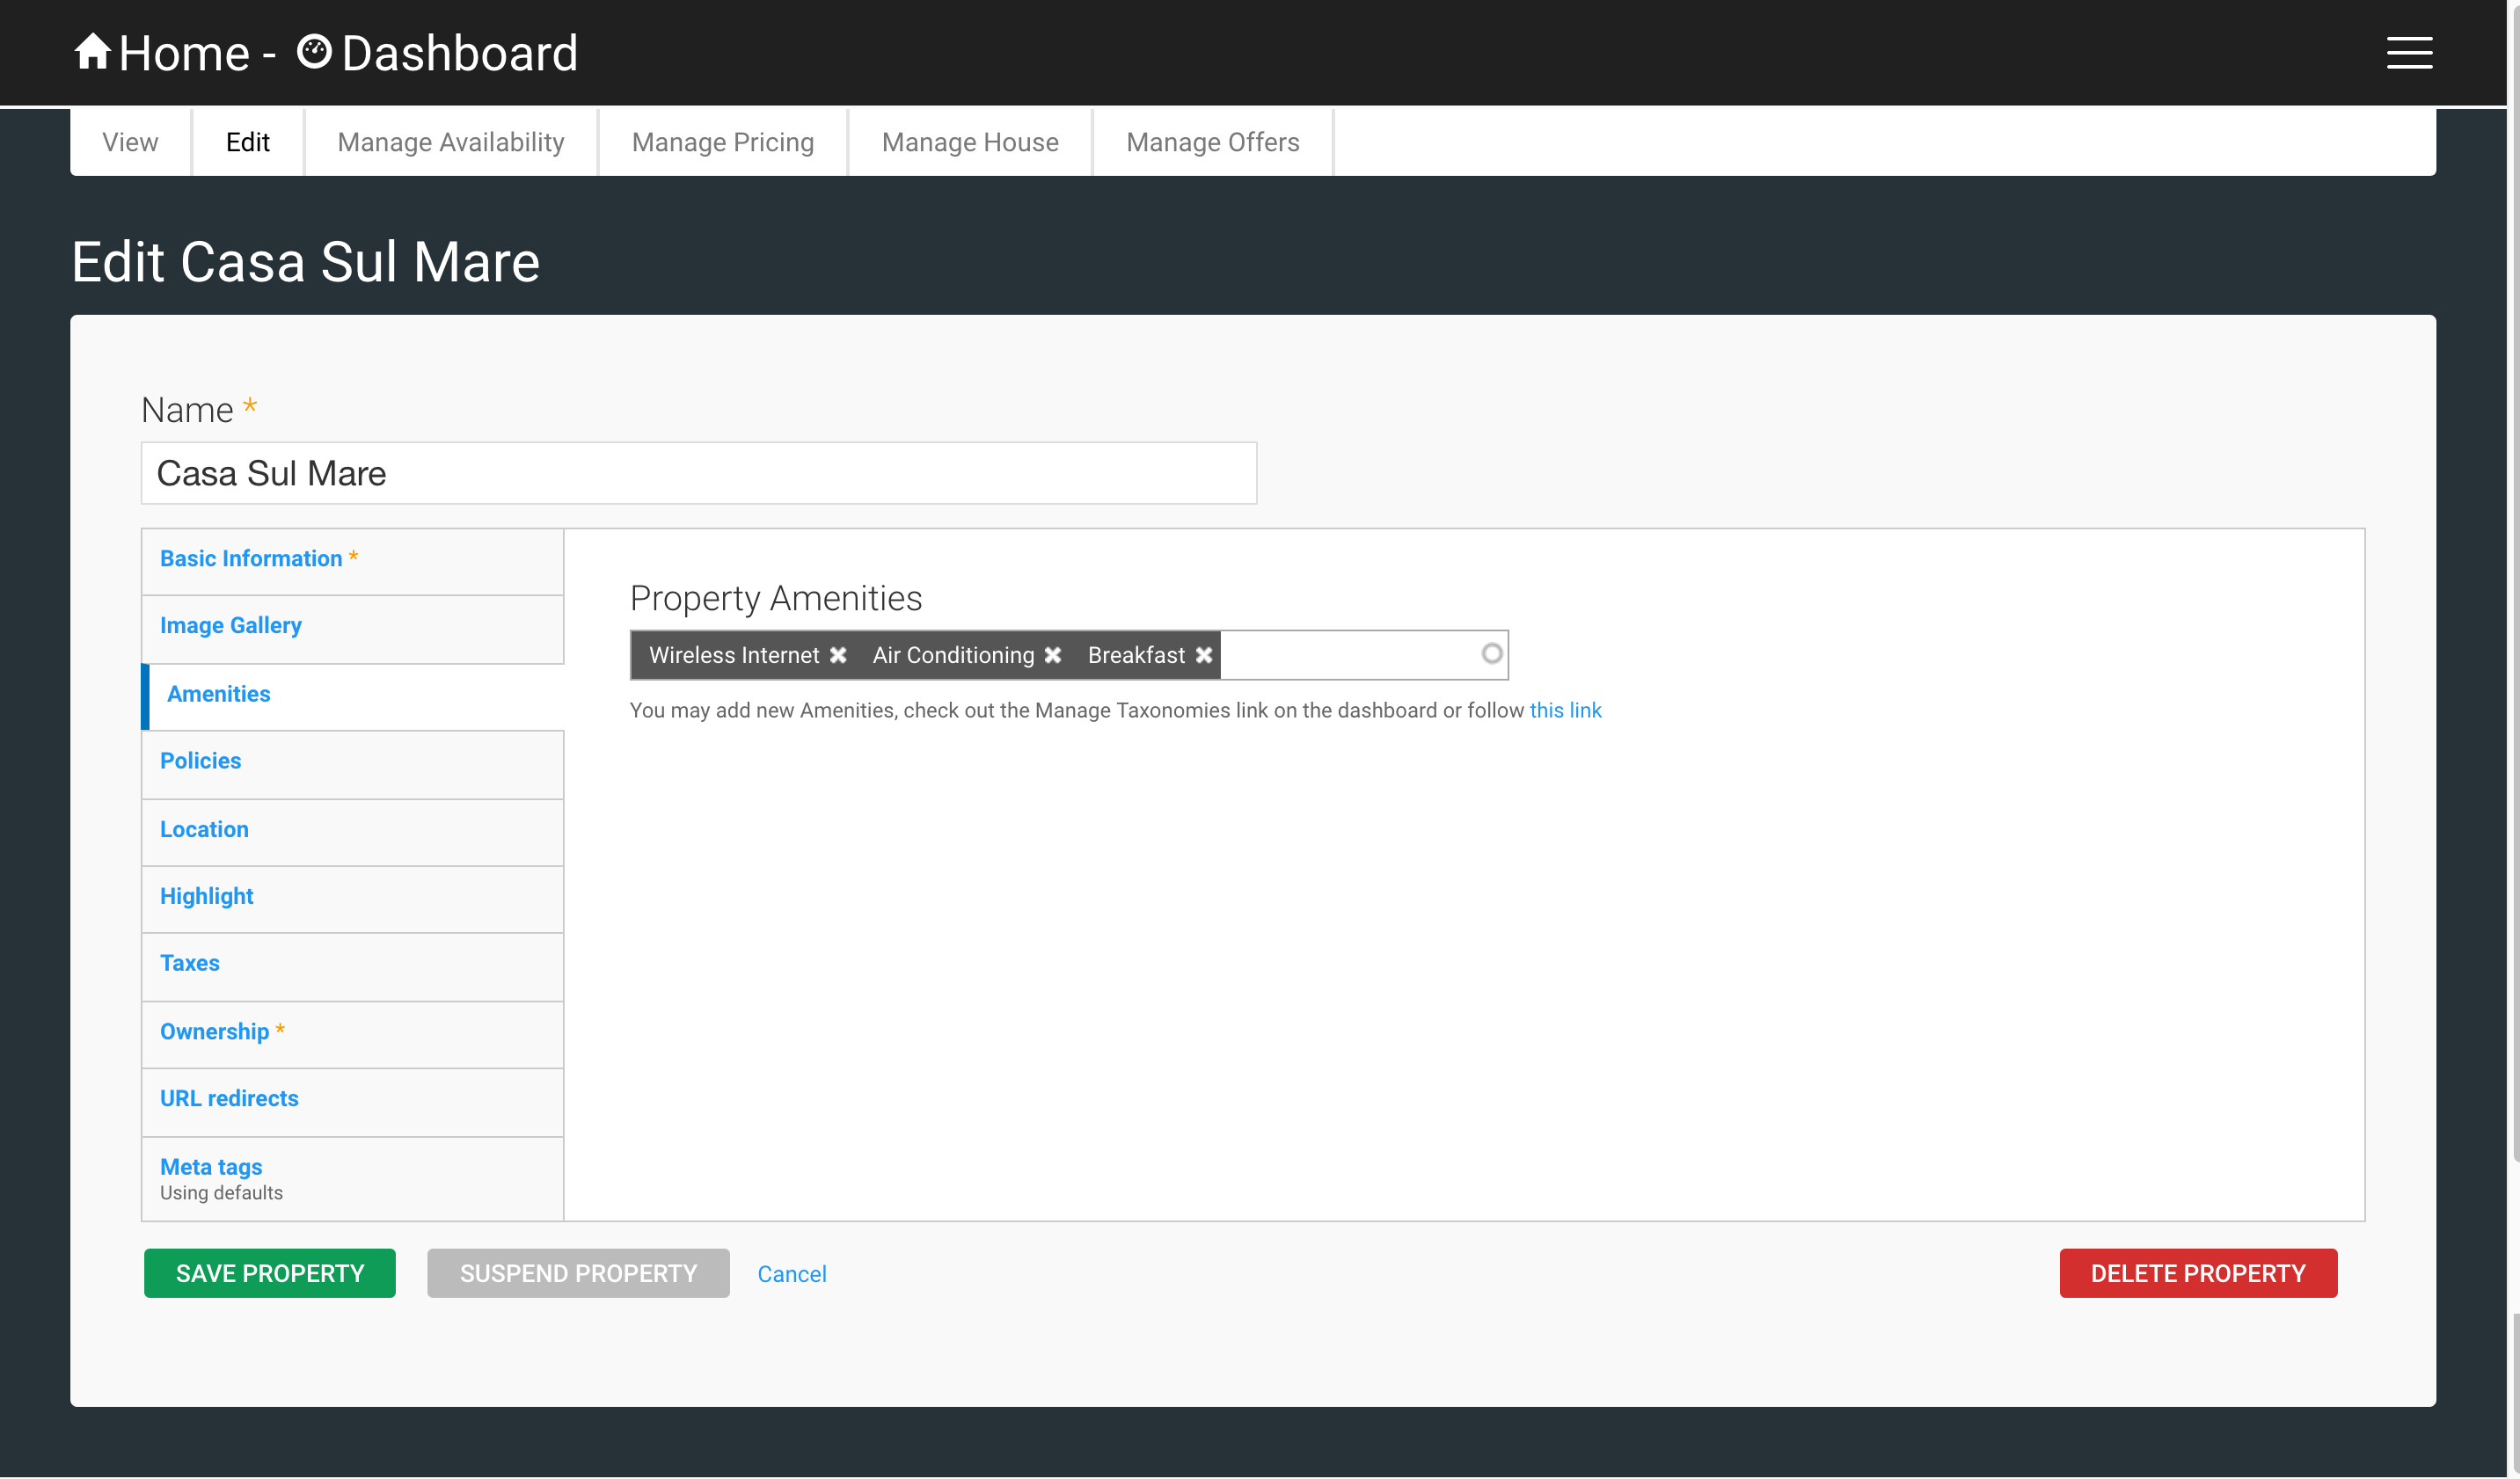
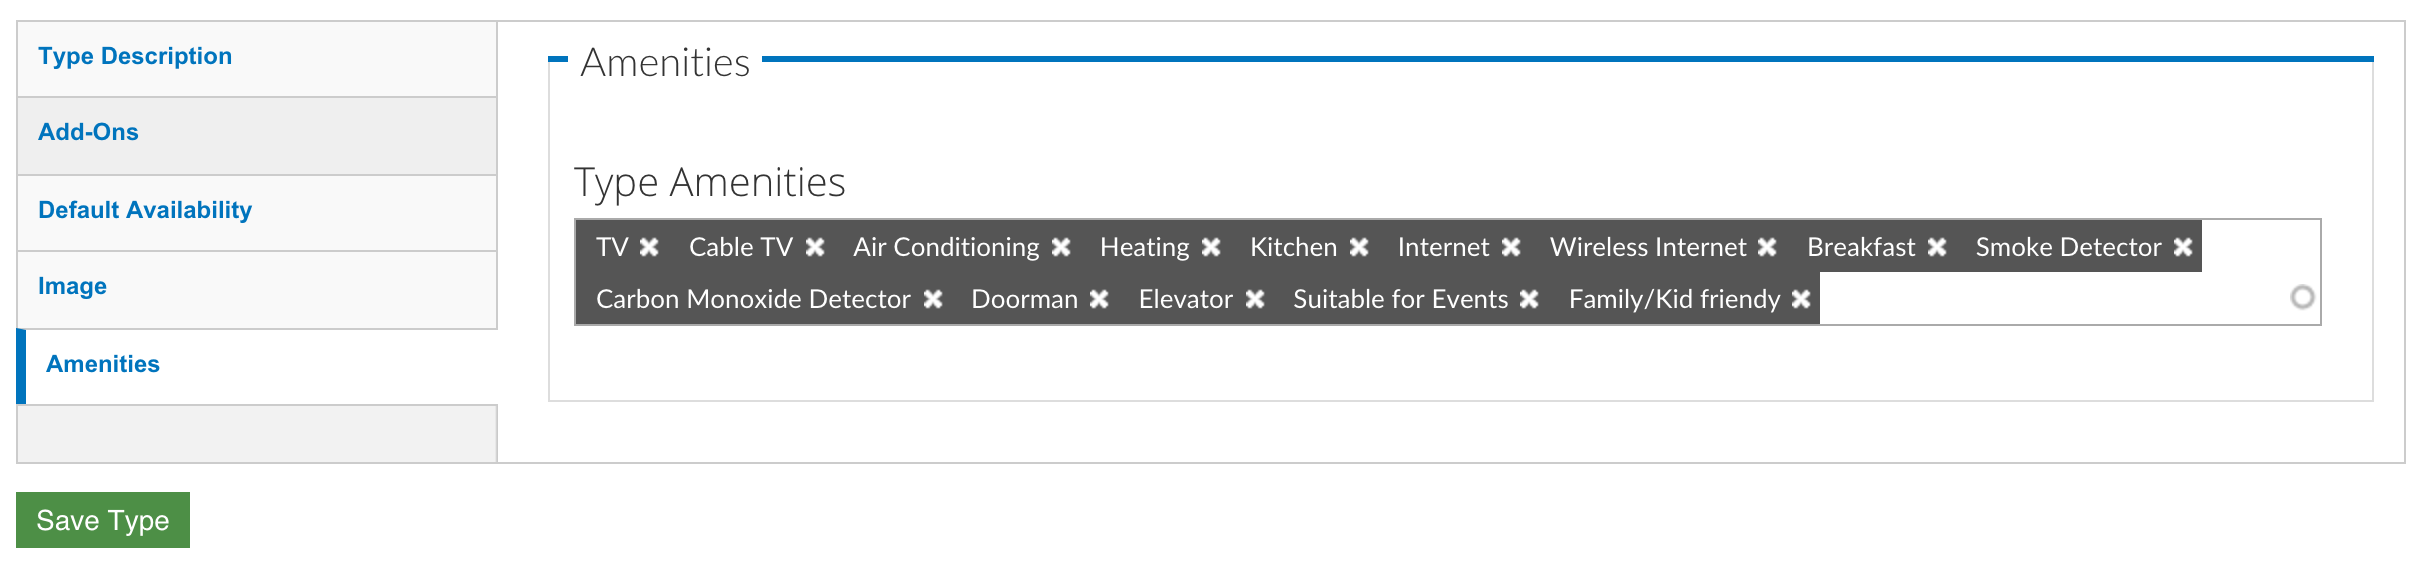
Amenities
Property amenities describe amenities available to a single-unit property, or amenities that are available to all rooms of a multi-unit property (such as a pool). These can be added by clicking in the field and selecting an amenity. You can select additional amenities by clicking again, next to the previously selected item. If the amenity you are looking for is not in the list, type the name (such as High Speed Internet). A box will appear with the text: “The term High Speed Internet will be added,” click on the box to create the amenity and add it to your property.
Highlight
Highlights are used to showcase features of your property. This could be rooms in your vacation rental or B & B, or special features of your Hotel, such as a swimming pool.

- Highlight Title
- This field labels the highlight you are wishing to display.
- Highlight Intro
- This field allows you to give a brief description of your property highlights.
- Highlight Images
- The images uploaded here are specific to your property highlights. Each photo can also be tagged with a unique caption.
Location
- Area
- The area is used in searches to narrow down a list of properties by area. Areas can be added by clicking in the field and selecting an area. You can select additional areas by clicking again, next to the previously selected item. If the area you are looking for is not in the list, type the name (such as New York City). A box will appear with the text: “The term New York City will be added,” click on the box to create the area and add it to your property.
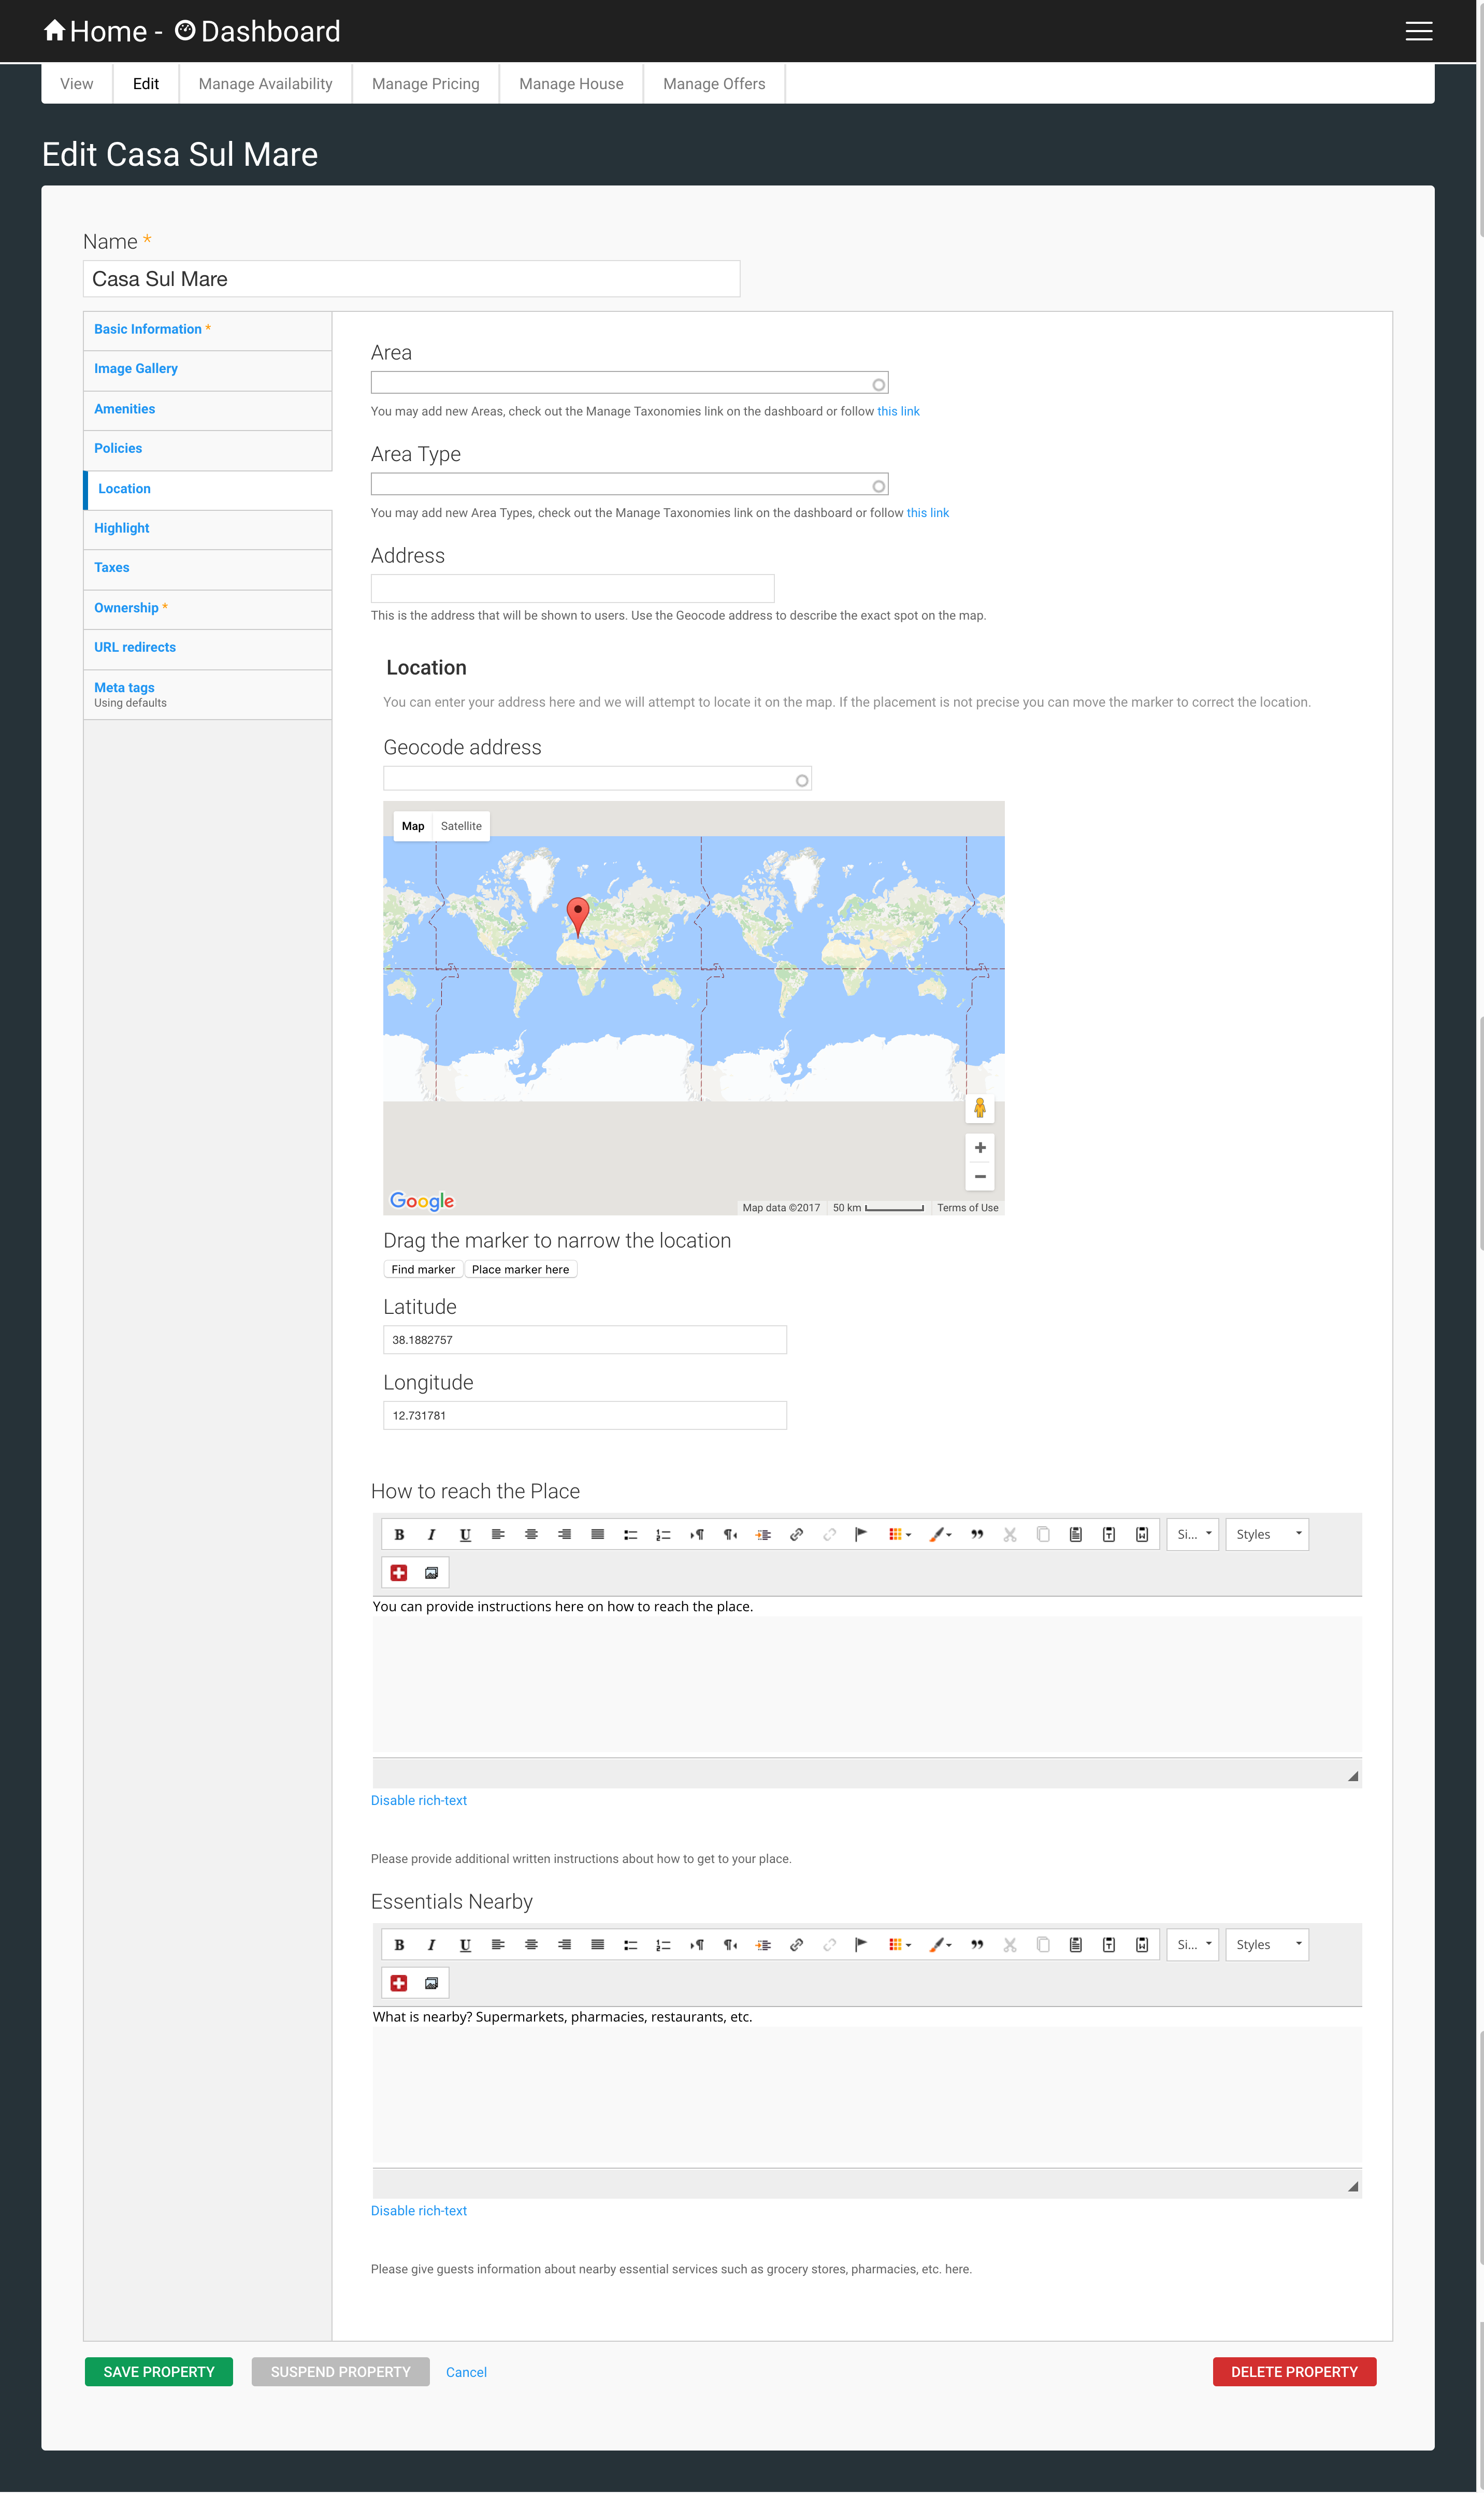
- Area Type
- The area type is another way of categorizing a property, and is generally used on large sites with many different properties. An example of an area type is Beachfront. Area types can be added by clicking in the field and selecting an area type. You can select additional area types by clicking again, next to the previously selected item. If the area type you are looking for is not in the list, type the name (such as Lakefront). A box will appear with the text: “The term Lakefront will be added,” click on the box to create the area type and add it to your property.
- Location
The address is optional. If you fill this in, it will be shown in a tooltip when the marker is clicked on. To set the marker location, use the Map Coordinates. The coordinates can be set in two ways:
- Enter an address in the Geocode Address field. Click on Find marker (under the map). Once the marker position has been moved, click on Place marker here and confirm.
- Drag the marker to the correct location on the map. Click on Find marker (under the map). Once the marker position has been moved, click on Place marker here and confirm.
Taxes
This tab simply allows you to choose whether or not taxes will be enabled on this property. Simply check the box, or leave blank.
Ownership
The ownership tab determines whether or not the name and image on the Property Owner Profile appear on your property listing. To display this information, enter your (or the appropriate owner’s) user ID in the Owner profile field. If you are the single owner/manager for your property, your user profile name will go into the Owner profile field and the Manager field. This means that in addition to your profile appearing on the property listing as the owner, you will also be the manager of the property, giving you access to all property management settings. Begin typing your name and select it from the drop down. If you simply type it out, it will not reference your profile correctly.
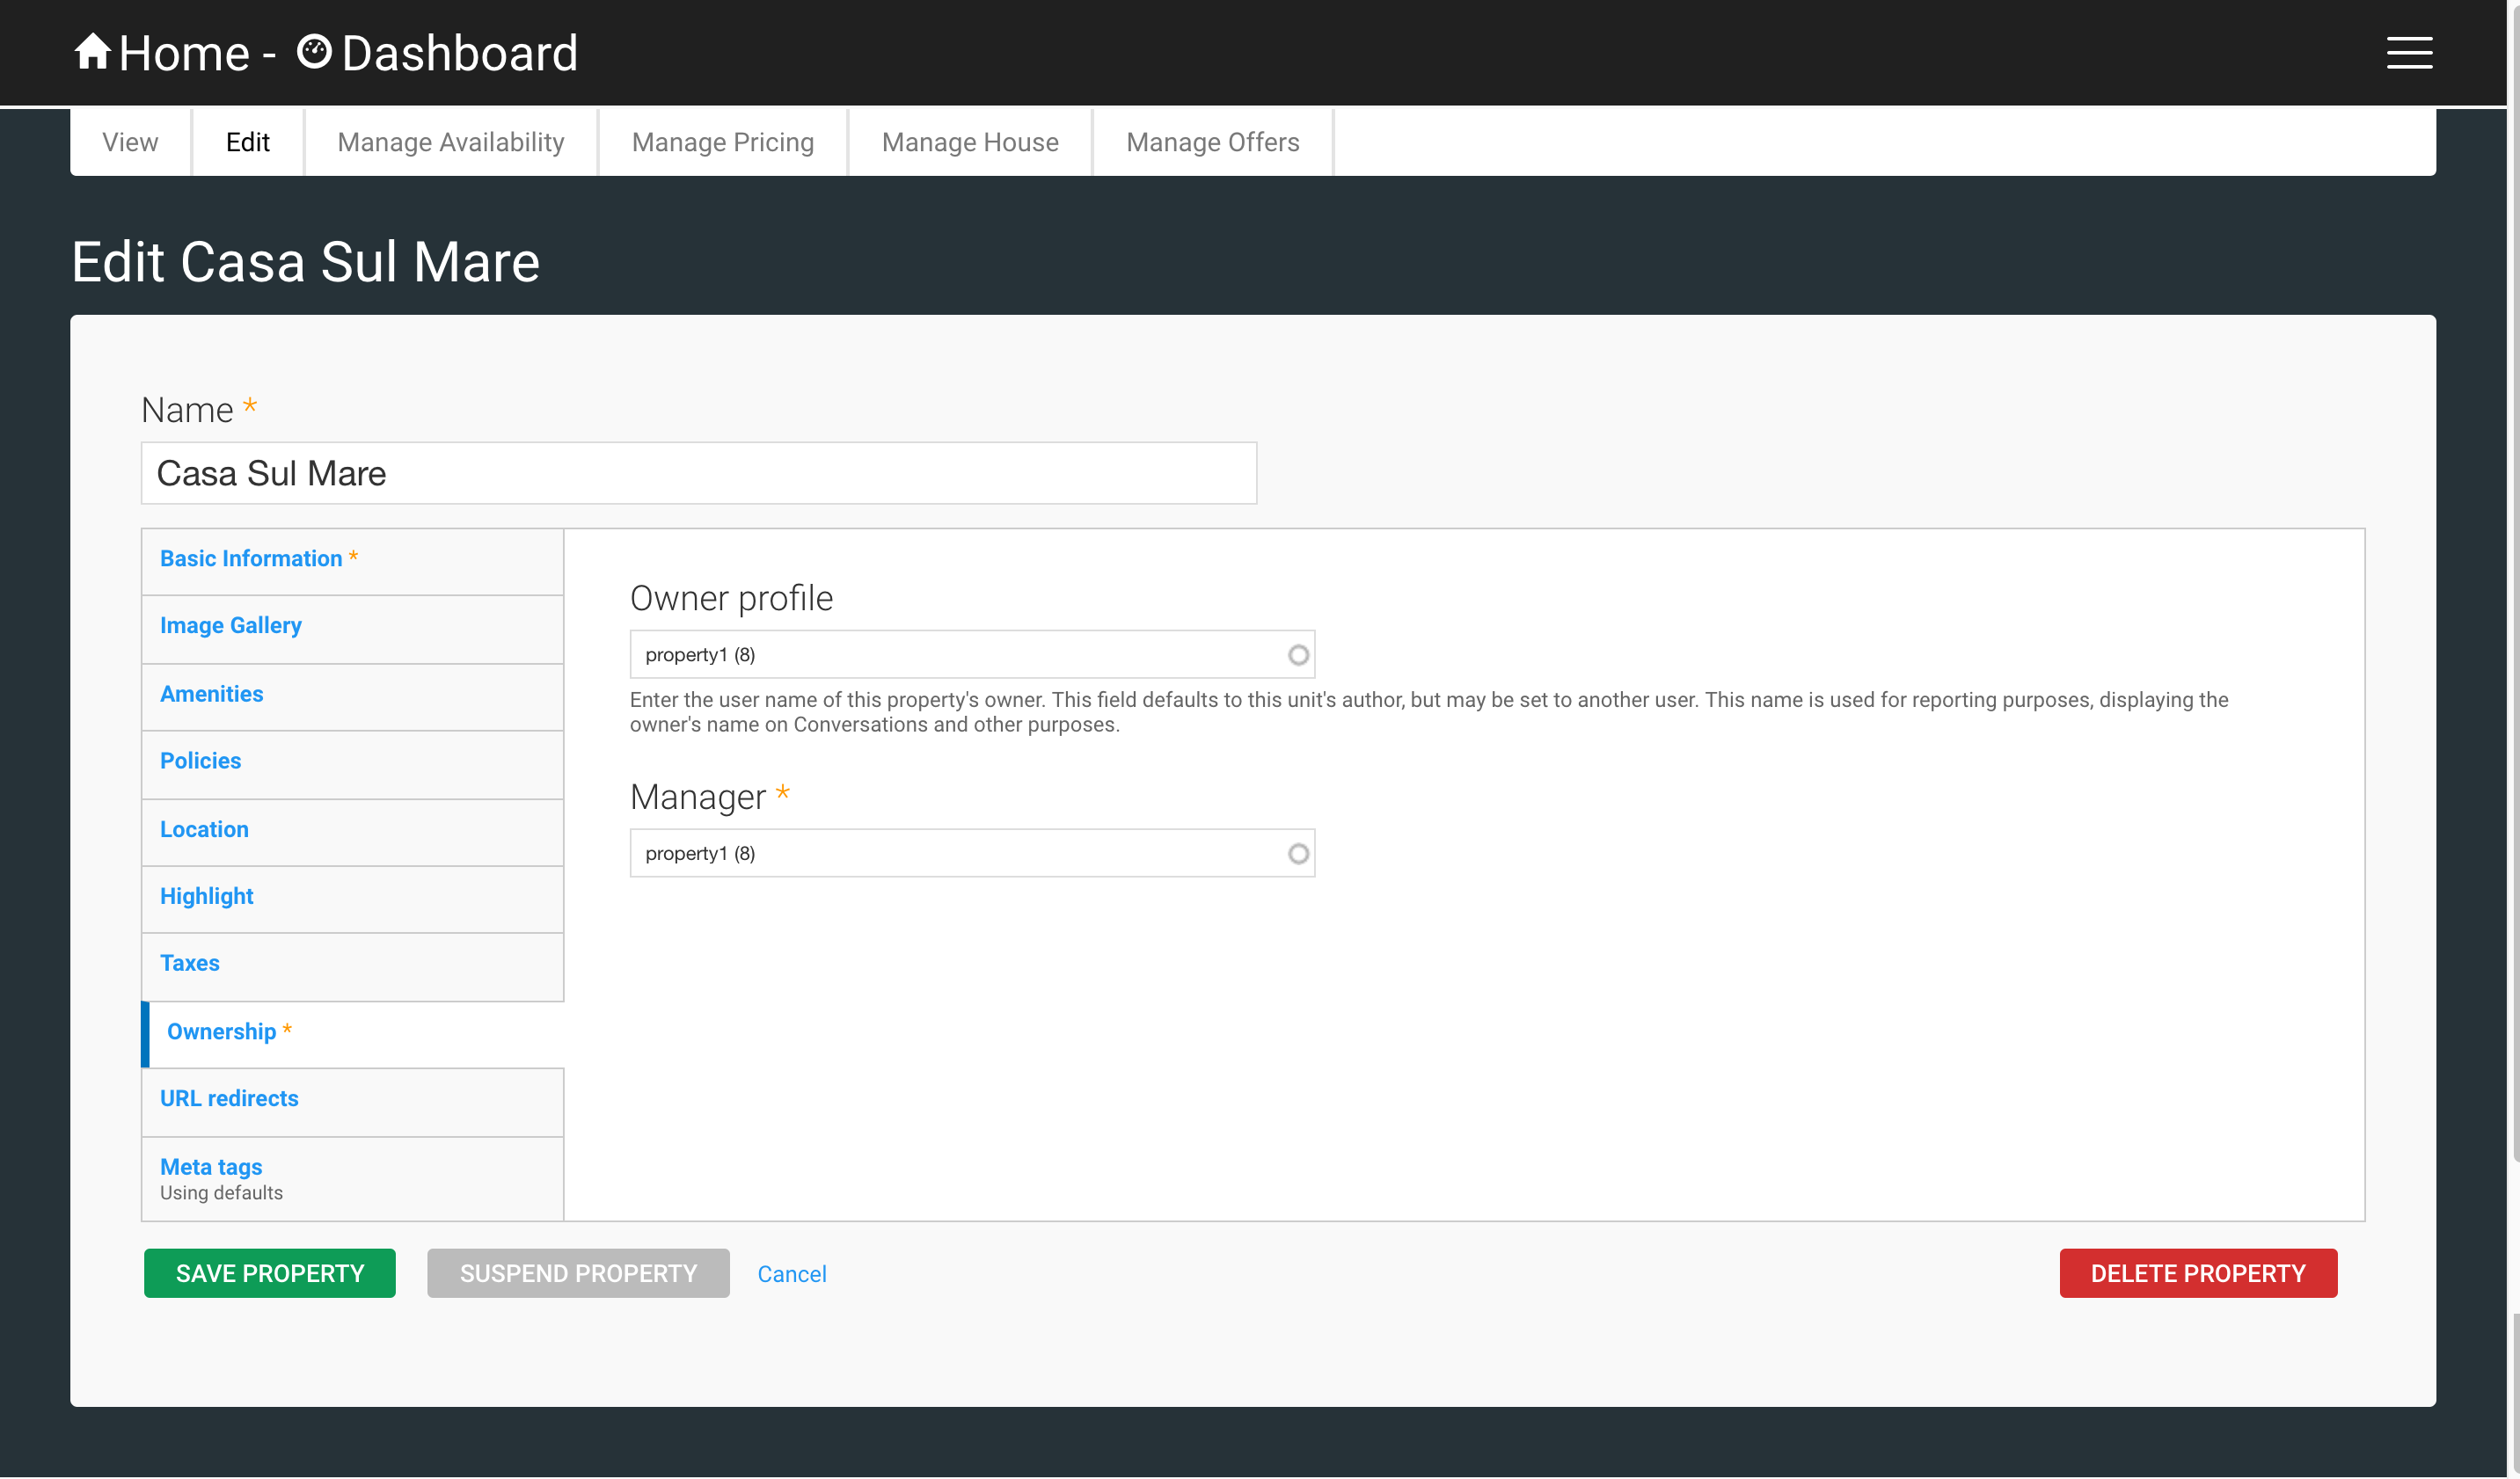
If you are the site manager, but not the owner of the property, your name will only go into the Manager field.
To set up or edit your, or other user profiles, please reference - My Profile
Manage Availability
To manage the availability of your property, click on the Manage Availability tab. This page will look much the same for a single-unit property and a multi-unit property, but both are managed the same way.
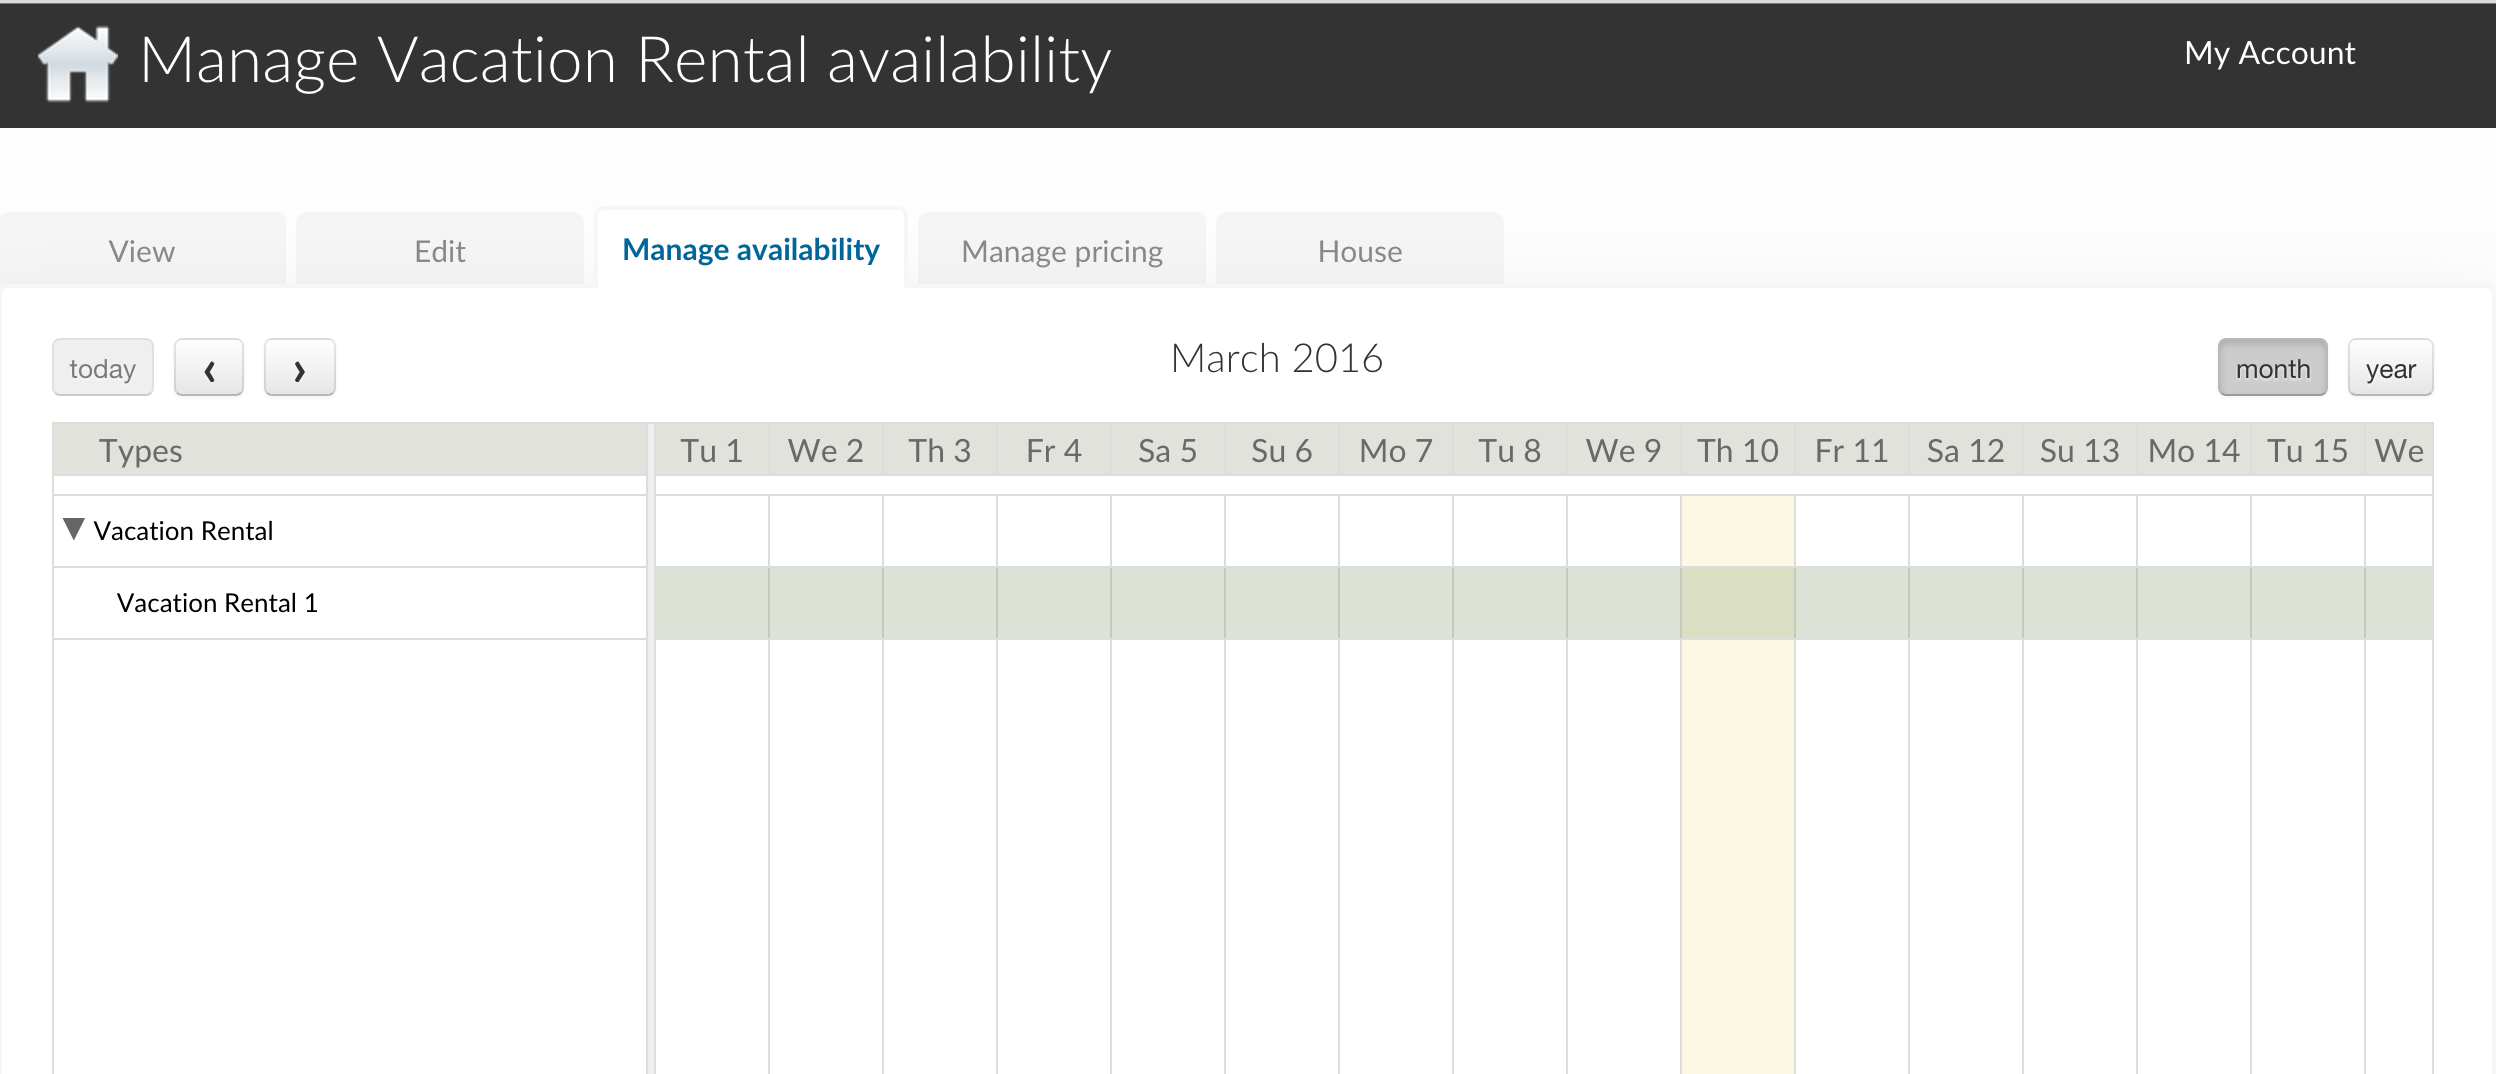
A single-unit property has only one unit to manage.
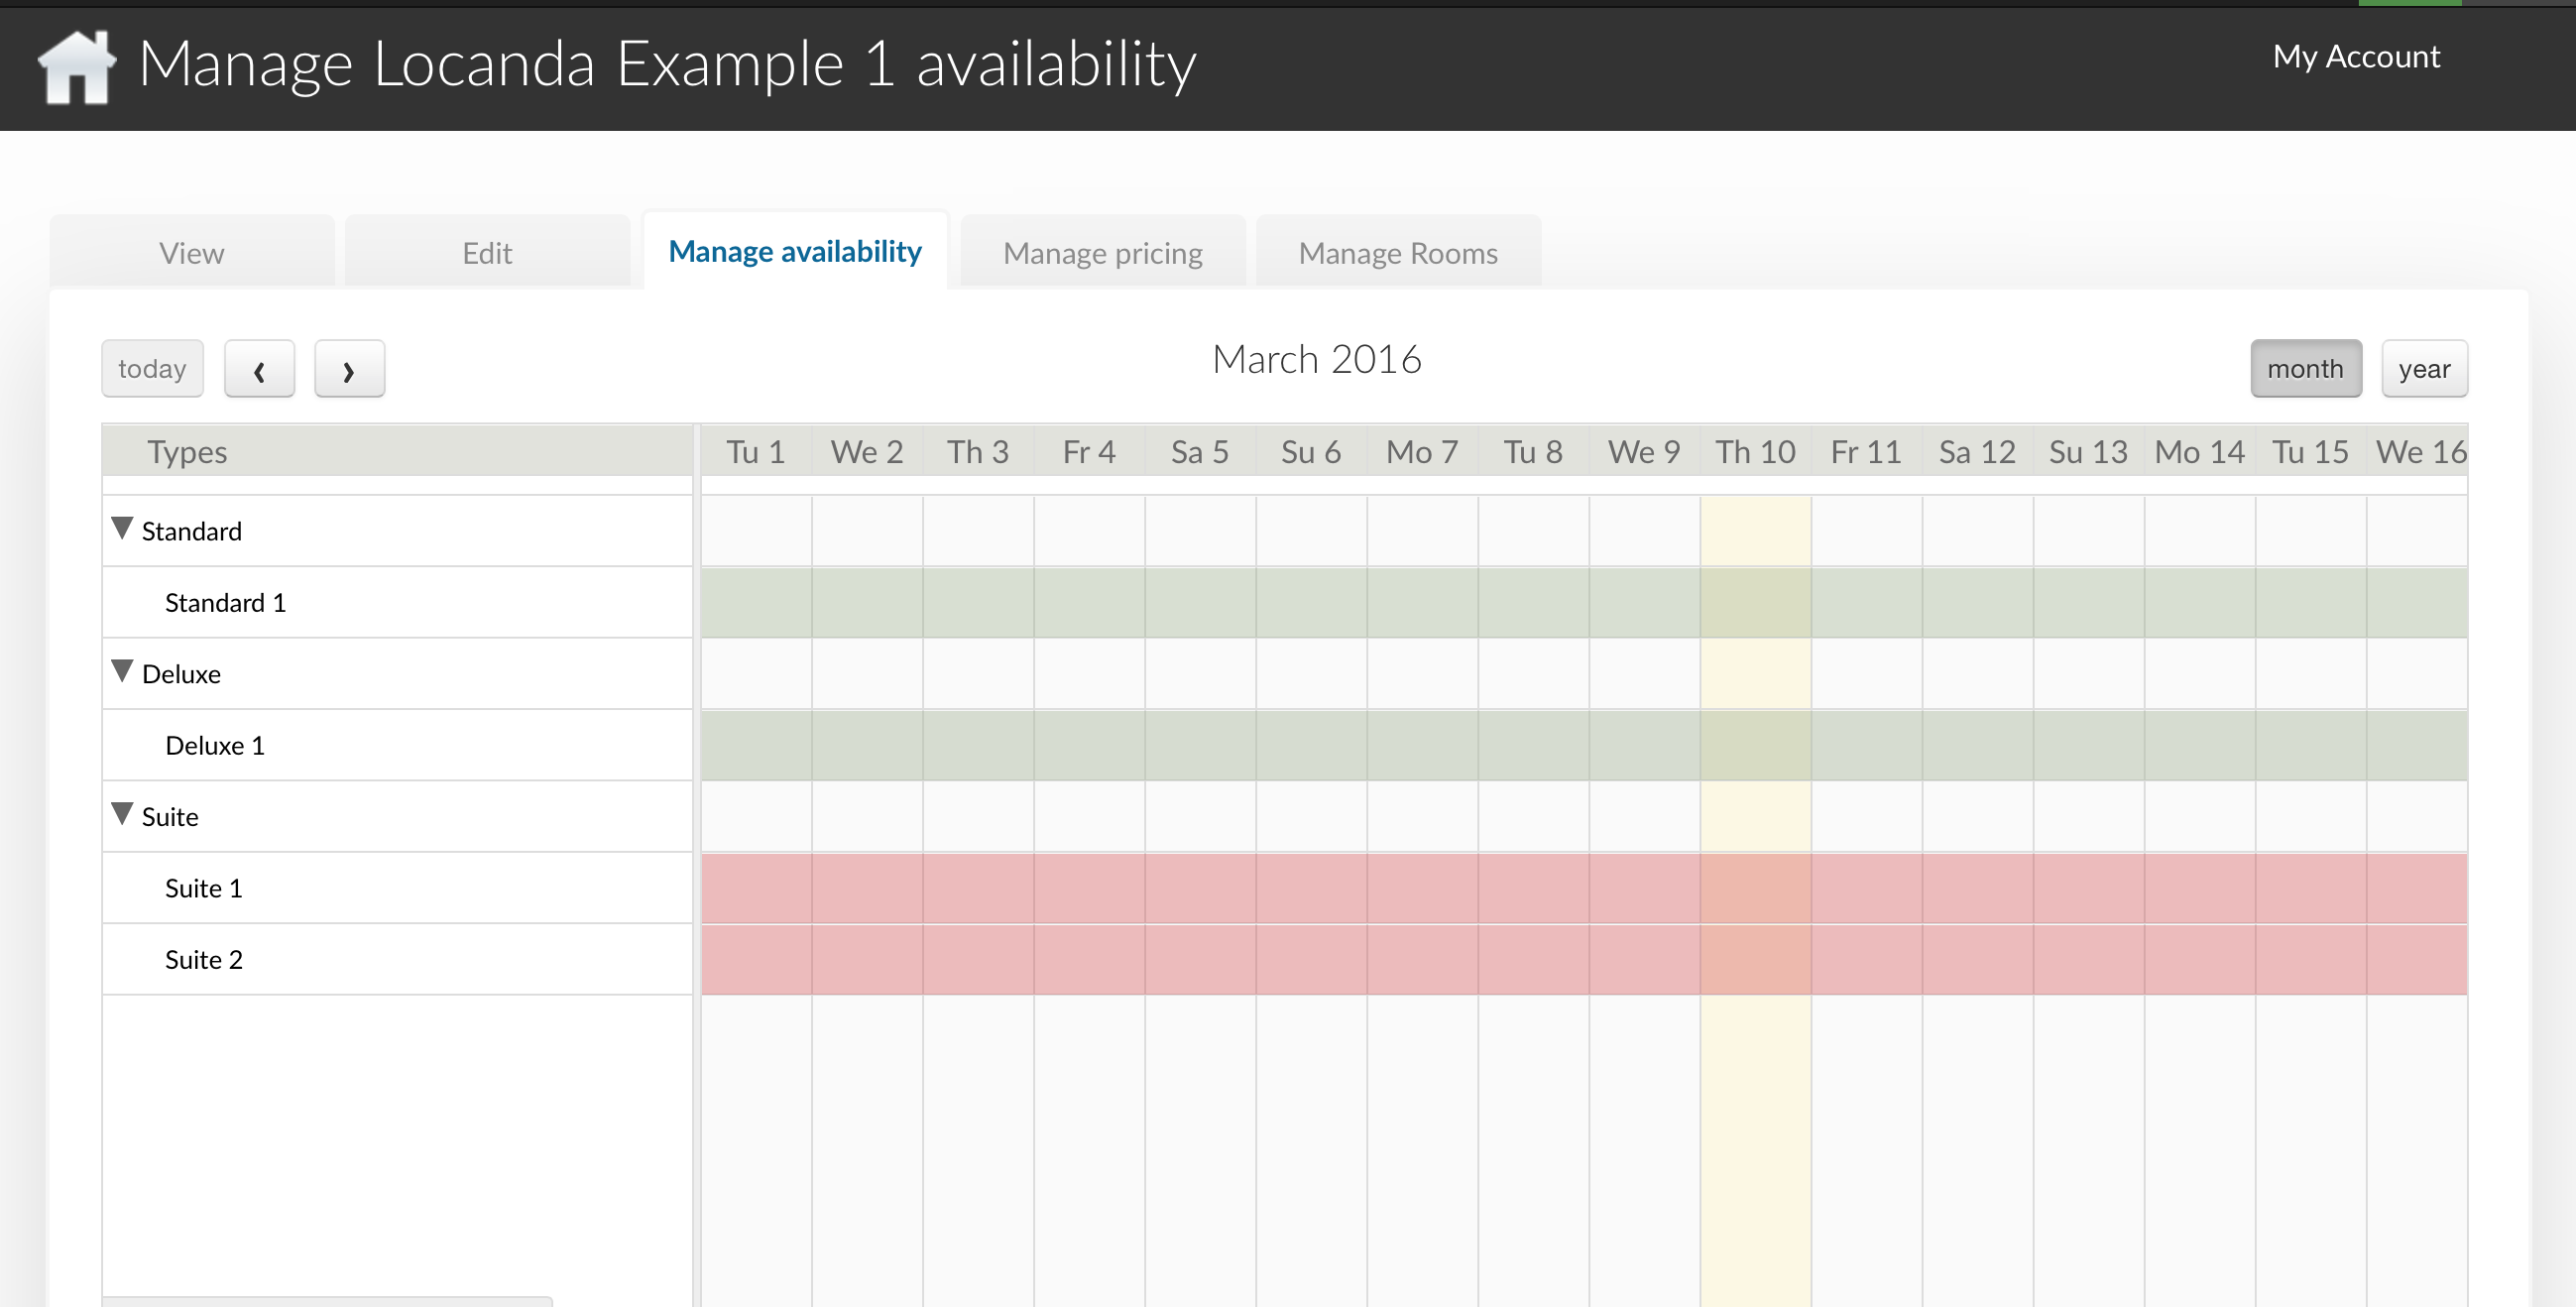
Multi-unit properties show all units in the same place.
The default status of a unit is indicated by the background color. A light red indicates the unit is unavailable by default, whereas a light green background indicates the unit is available. To change the default availability for a type and its unit(s), see Pricing and Availability.
To override the default availability, select a date or range of dates for the unit. (To select a range of dates click and drag the dates you wish to update.) You will be given three choices: Make Available, Make Unavailable, and Create Booking.
Manage Pricing
To manage the pricing of your property, click on the Manage Pricing tab. This tab offers options for price customization.
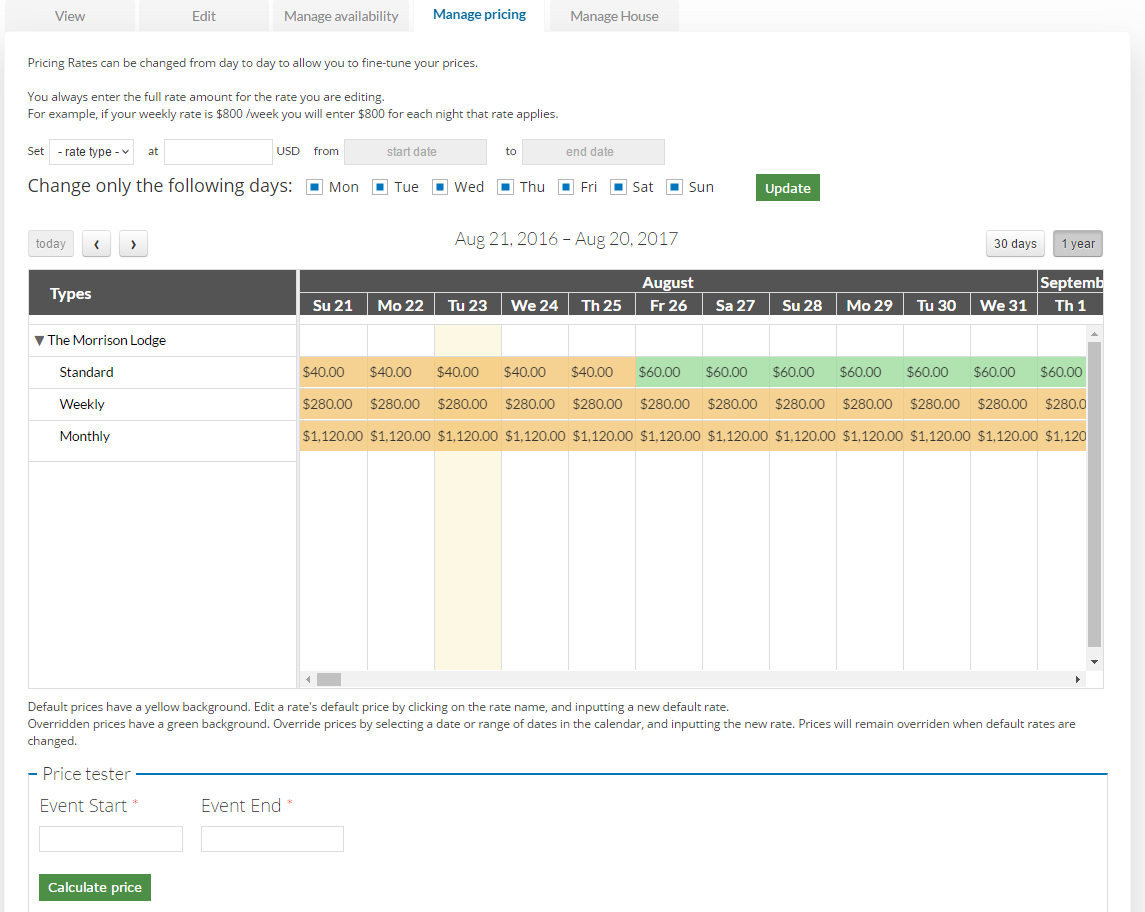
You can set unique prices for Standard, Weekly, and Monthly rentals. You can also set up specific dates and/or specific week days with unique pricing. This feature is helpful when managing tourism and off-season demand differences. The first set of drop-downs allows you to set a specific price for one of the rate categories to be applied during the dates you select. Further adaptability allows you to check which days of the week you want the special rate applied. The calendar allows you to see your pricing settings applied. At the bottom of the page is the Price tester. This allows you to input a rental demand and ensure that the resulting price is what you intended.
Manage Rooms
A Property will either have a House (single-unit property) or multiple Rooms (multi-unit property) associated with it. To manage the Rooms of your multi-unit property, click on the Manage Rooms tab.
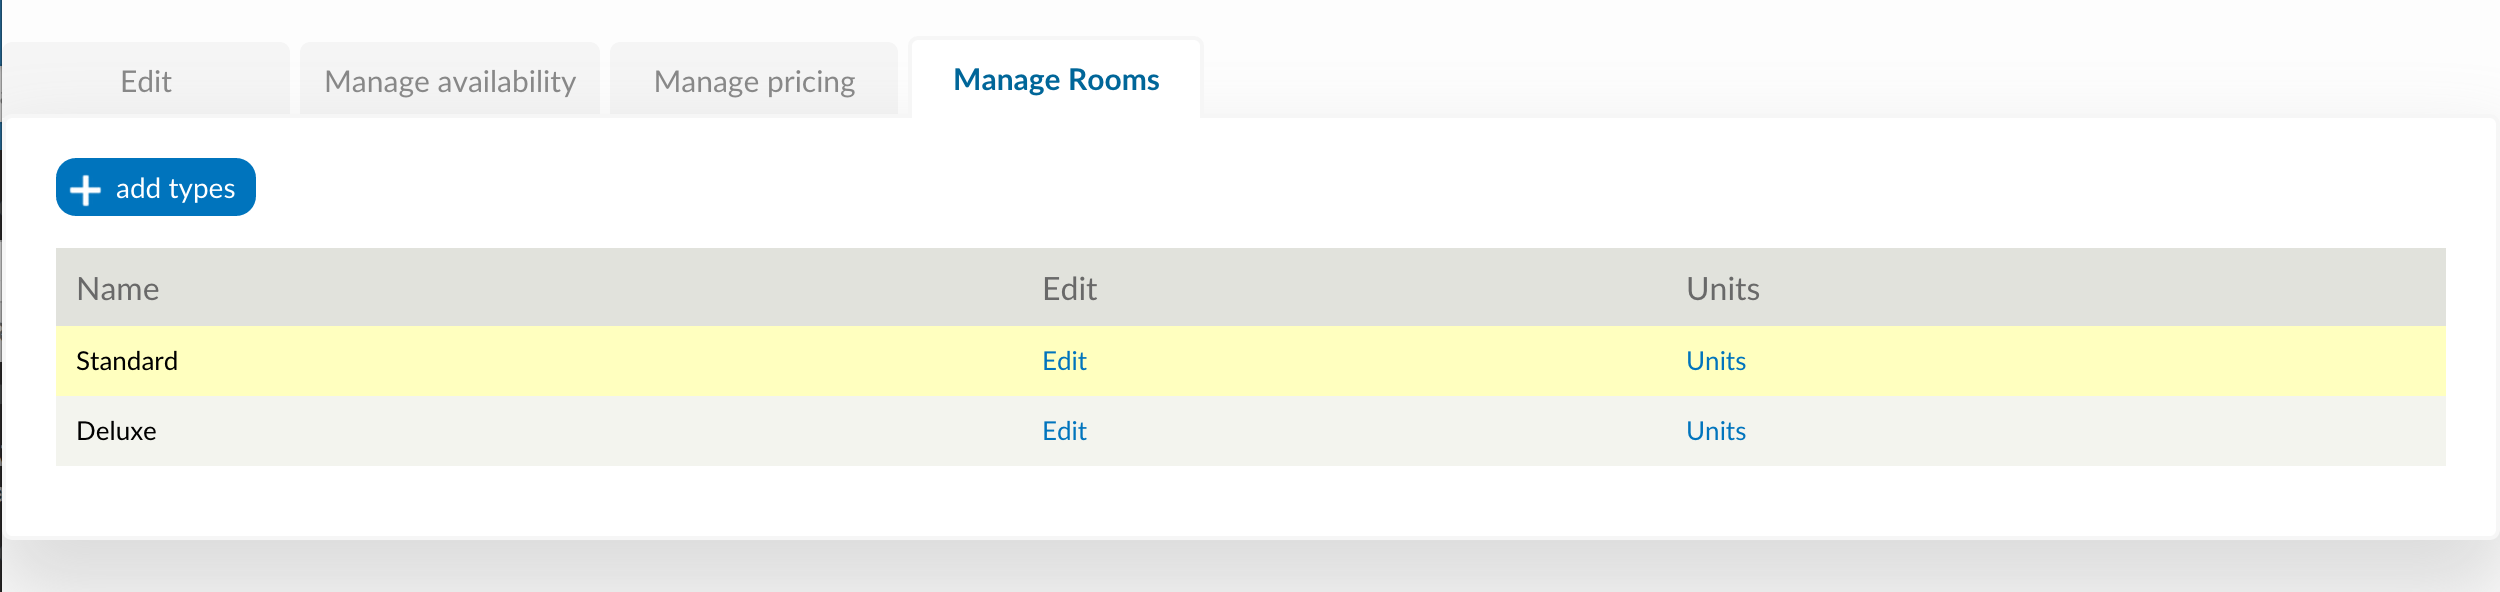
- In this tab, you can:
Add additional types (using the same interface with which you added a property), by clicking on the add type button.
Edit an existing type, by clicking on the Edit link for the type you wish to update. Edit Room/House
Edit the name of the Unit(s) of a type, by clicking on the Units link for the type you wish to update, and then again on Edit Unit. Update the name, and click Save Unit. The Edit tab will take you to the editing interface for the Room type that unit belongs to, or you can click on the Back to Property tab to return to your property.
Manage House
A Property will either have a House (single-unit property) or multiple Rooms (multi-unit property) associated with it. To manage the House of your single-unit property, click on the House tab.
Next, click on Edit, next to your house name. (Should generally be the same as the name of your property, but this is not required).

Booking Constraints
At the top of the Edit page are the configurable Booking Constraints. These allow you to set up how far in advance you will accept bookings, and how short of notice you will accept.
Edit Room/House
Type Description
This tab contains the basic information about the house or room type. Specify the maximum number of people that can be accommodated, the number of single beds (twin/bunks), the number of double beds (full/queen/king), number of bedrooms, and number of bathrooms.
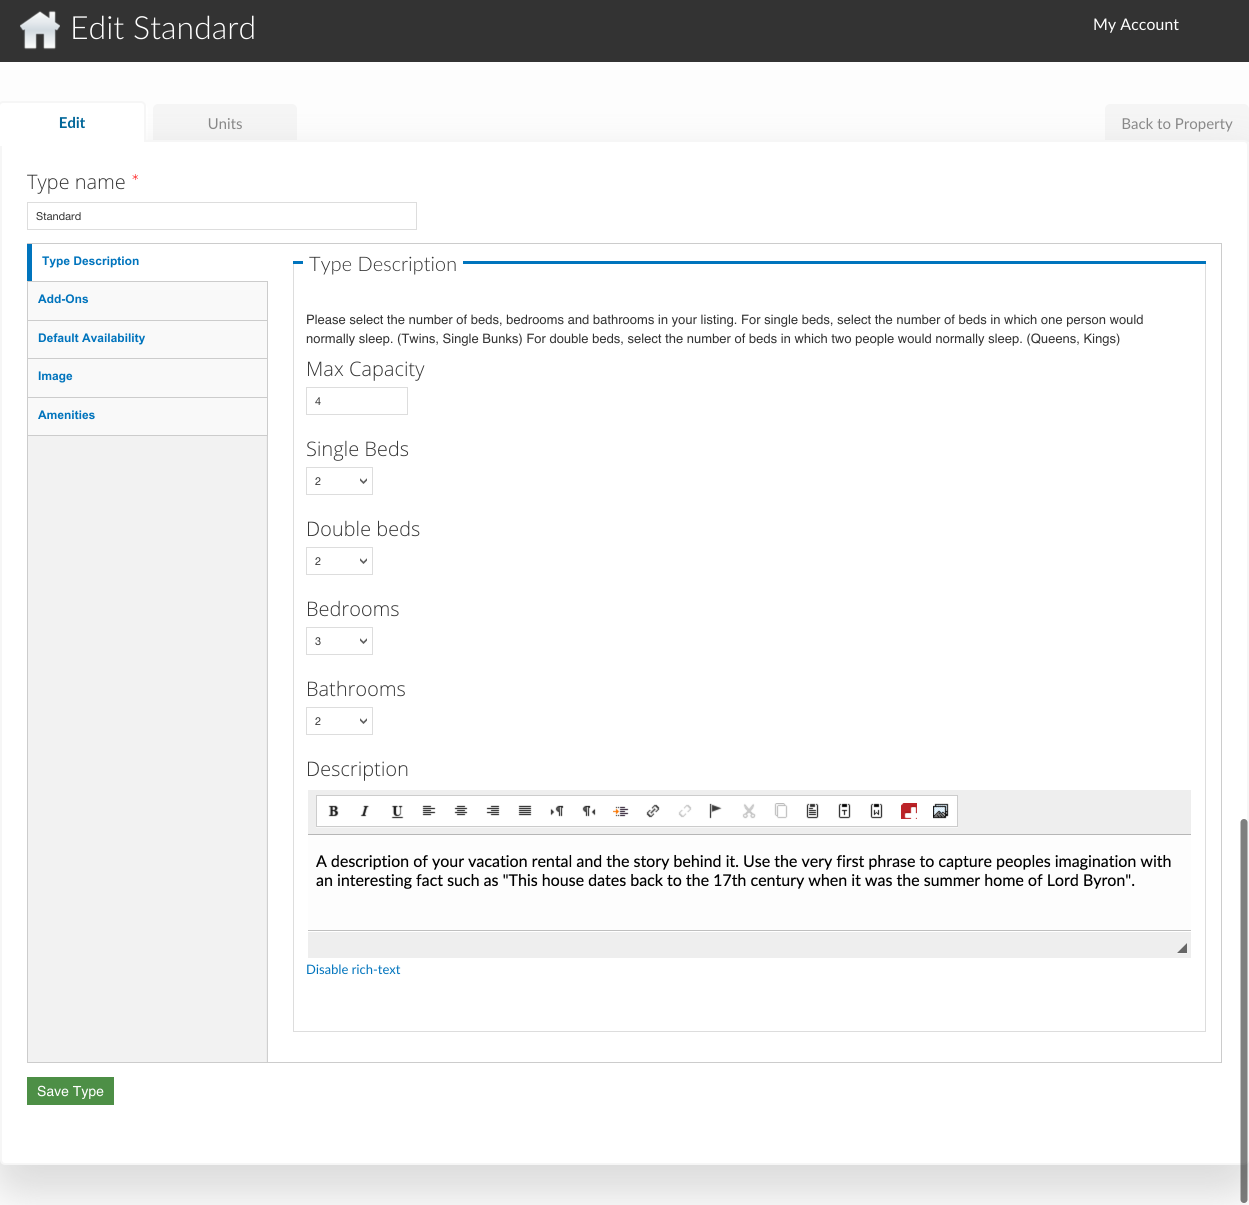
The Description field allows you to describe this room type, and will be displayed in a tooltip on the property page.
Note
The description field is used for multi-unit Properties only
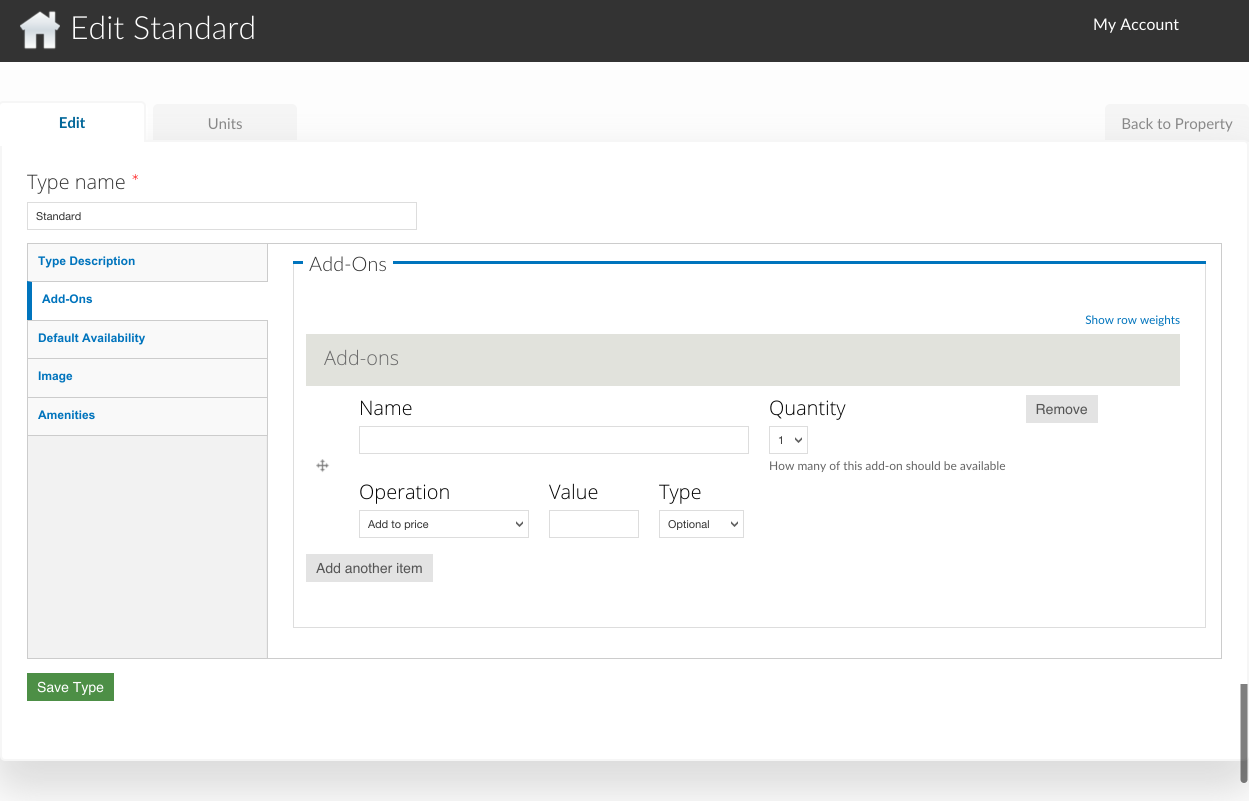
Add-Ons
Property Add-Ons allow guests to tailor their experience at your property, and may be configured to raise, lower or replace the price, per stay or per night. They are highly flexible, and there is no limit to the number of add-ons you may offer your guests. If made mandatory, they will be automatically added to a booking, and required for check out - this is useful for configuring per-stay charges such as a cleaning fee.
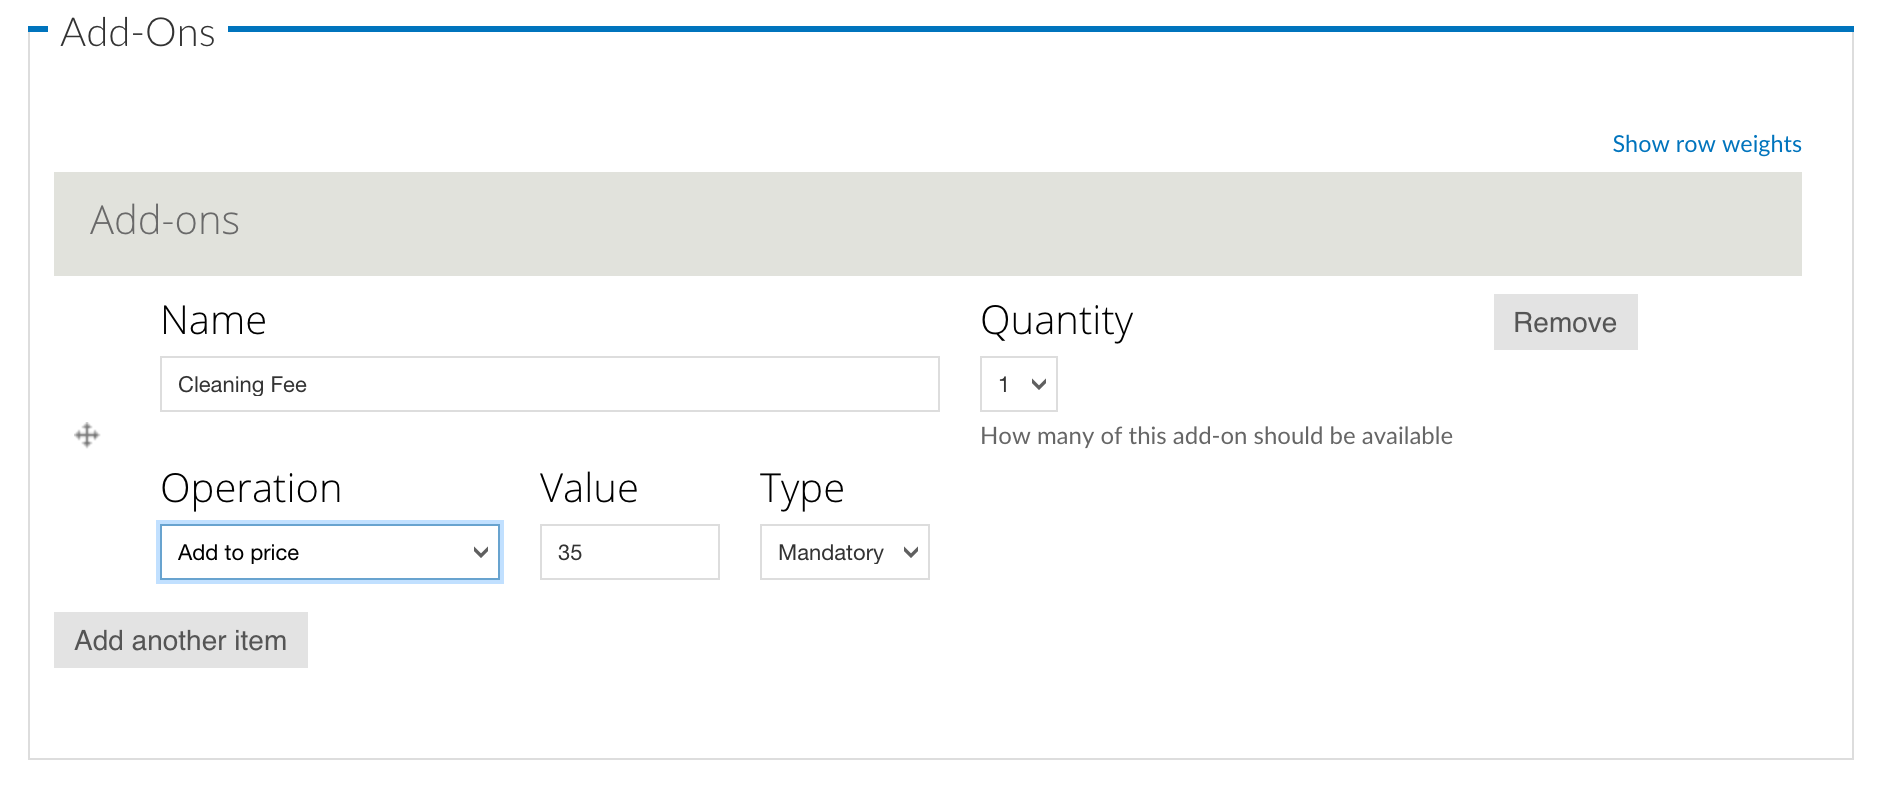
To charge a mandatory cleaning fee of $35 per stay, we would add an add-on configured as follows:
Name: Cleaning fee
Quantity: 1
Operation: Add to price will add the fee per stay, as opposed to per night.
Value: $35
Type: Mandatory
To offer roll-away beds for $20 per night, click the Add another item button and configure the new add-on as follows:
Name: Roll-away bed
Quantity: 2 (This will allow guests to request up to 2 beds)
Operation: Add to price per night
Value: $20
Type: Optional

To allow guests to request a crib which costs $50 per stay, but may or may not be available, click the Add another item button and configure the new add-on as follows:
Name: Crib
Quantity: 1
Operation: Add to price
Value: $50
Type: On Request - the add-on’s price will be displayed, but not added to the total. You will be responsible for collecting the additional fee at check-in if the add-on is available.

Pricing and Availability
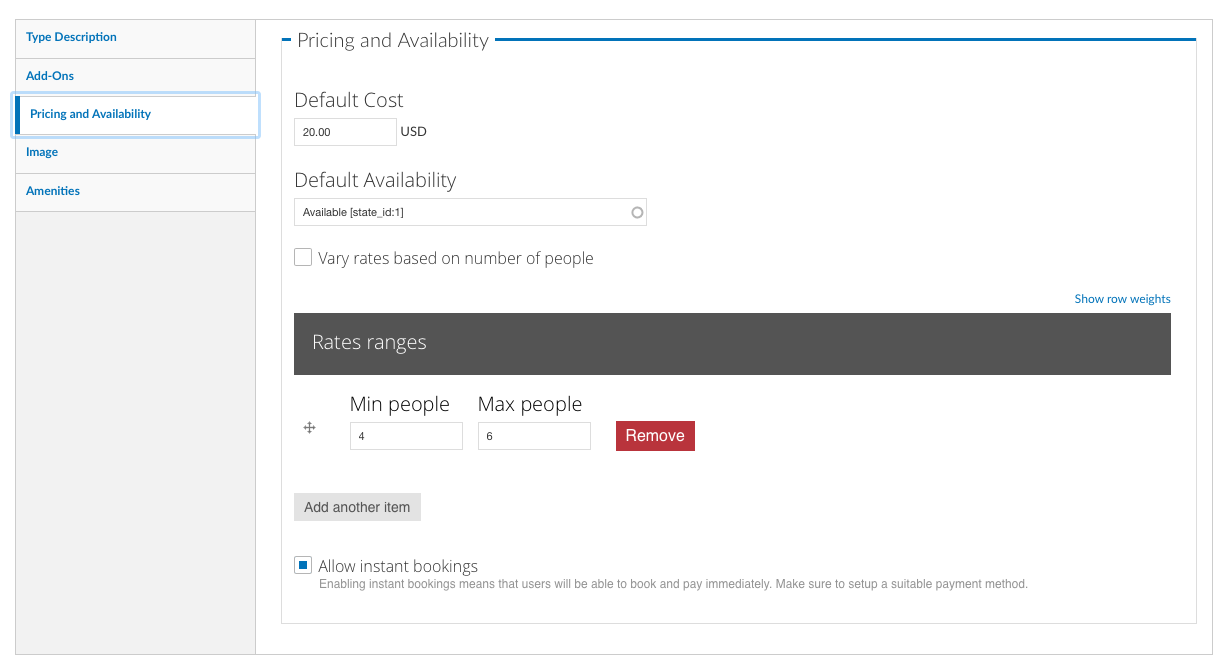
- Default Cost
- The default cost field determines the initial cost per night when a new rate set is generated. Once a rate set has been created, changes to the default cost field will have no effect, and the default is managed from within the ‘Manage Pricing’ tab of your Property.
- Default Availability
- The default availability field allows you to quickly make all units of a room type not available, by changing the field value to Not Available. Conversely, if you have made a type not available, and want to change it back to available again, change the field value to Available. You will see these changes reflected in the Manage Availability tab of your property.
- Vary rates based on number of people
This setting enables pricing for your Room or House to be calculated based on the number of people that are staying in the Room/House. For example, if your House has a mazimum capacity of 10 people, and you wish to charge 100/night for 5 to 10 people, and only 85/night for less than five, you would check the box, and then:
- In the Rates ranges section, fill in Min people = 1 and Max people = 4
- Click on ‘add another item’
- In the new fields, fill in Min people = 5 and Max people = 10
- Click on ‘Save Type’, at the bottom of the page
This will create a new set of rates (daily/weekly/monthly) for each of the two ranges of people, that can be managed in the ‘Manage Pricing’ tab of your property. Person range rates can be created and edited at any point, and until the ‘Vary rates based on number of people’ box is checked, they will not affect the rates seen by guests making bookings. Once you have set up your rates to your satisfaction, check the box, and bookings will be priced for that House/Room according to the number of people that will be staying.
- Allow instant bookings
- If the site on which your property is listed allows instant bookings, this switch will allow you to turn off instant bookings for House or Room, and only take bookings via Enquiries. This setting will override the Allow instant bookings setting on the House or Room’s Property, and will have no effect at all if instant bookings have been disabled site-wide.
Amenities (Room)
Room amenities are amenities that are specific to a certain room or room type. These are not used for single unit properties, and should be left blank. Add room amenities by clicking in the field and selecting an amenity. You can select additional amenities by clicking again, next to the previously selected item. If the amenity you are looking for is not in the list, type the name (such as High Speed Internet). A box will appear with the text: “The term High Speed Internet will be added,” click on the box to create the amenity and add it to your property.